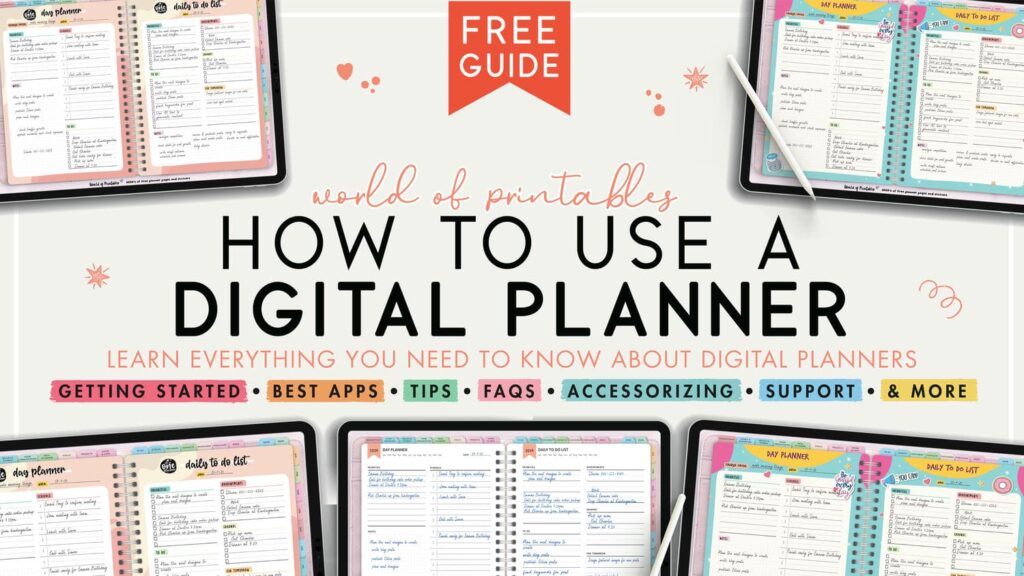
Welcome to the Future of Organization: Everything You Need to Know about Digital Planners!
Are you still carrying around a bulky planner filled with scribbles, sticky notes, and crossed-out tasks? Or perhaps you’ve been hesitating to start planning at all because it seems too overwhelming? Well, it’s time to ditch the paper and welcome the sleek, eco-friendly world of digital planners!
No matter who you are, a digital planner is your secret tool to ultimate organization. And the best part? You can carry it with you everywhere without the extra weight! Let’s dive into why digital planners are the future and how you can start using one today.
- What is a Digital Planner?
- Getting Started with Digital Planners: The Basics
- Tips for Using Digital Planners Efficiently
- Organizing Your Life With Digital Planners
- Advanced Digital Planner Features & Customizations
- Common Digital Planner Mistakes & How to Avoid Them
- Digital Planner Tips & Tricks to Maximize Your Planner’s Potential
- Making Your Digital Planner Fun & Engaging
- Using Digital Planners for Personal Growth
- Seasonal Planning Tips
- Planner Challenges and Accountability
- Analytics and Reviewing Progress in Digital Planners
- Adapting Digital Planners for Different Learning Styles
- Digital Planner Security and Backup
- Eco-Friendly Benefits of Digital Planning
- Digital Planner Community & Support
What is a Digital Planner?
A digital planner is like a paper planner’s tech-savvy sibling – it has everything you love about traditional planners (calendars, to-do lists, notes) but with extra digital flair! Picture this: an interactive, customizable, and easily editable planner that lives on your tablet, phone, or computer. No more erasing mistakes or flipping through pages frantically trying to find that one task. With a digital planner, everything is neatly organized and just a tap away!
You can write, type, add stickers, and even use fun digital tools like highlighters without any mess. And if you’re feeling fancy, you can sync it across your devices, start planning on your tablet, check your schedule on your phone, and make updates on your computer!
Why Go Digital?
Still on the fence about switching from paper to digital? Let’s break down the top reasons digital planners are the way to go:
- Eco-Friendly: Save trees by cutting down on paper use. Plus, no need to keep buying new planners every year!
- Flexibility: Need to move things around? Done! Made a mistake? Just erase it! Want to change the color scheme? Easy peasy.
- Portability: Whether you’re using a tablet, phone, or computer, your planner is always with you – no more lugging around heavy notebooks.
- Customization: From colors to fonts to layouts, you can make your planner look exactly how you want it. Add stickers, doodles, or even your own designs!
- Backup & Restore: Never worry about losing your planner. Back it up to the cloud, and you’ll always have access, even if your device dies.
- Syncing & Reminders: Sync your planner with your calendar, get reminders, and stay on top of everything, whether you’re planning your work schedule, grocery shopping, or a family vacation!
The Best Apps for Digital Planning
Now that you’re excited about the idea of going digital, let’s talk apps! There are a few top players in the digital planning world, and choosing the right one can make all the difference:
- GoodNotes: Perfect for those who love the feeling of handwriting on a tablet. GoodNotes is simple, clean, and ideal for those who want a natural writing experience with the ability to add stickers and hyperlinks.
- Notability: This one’s a game-changer for students or professionals. It offers note-taking and audio recording features, making it perfect for meetings or lectures.
- Penly: One of the best digital planner apps for Android.
- ZoomNotes: For the power users out there, ZoomNotes has advanced features like zooming into details, layers, and more complex layouts.
- PDF Expert or Adobe Acrobat: If you just need a simple PDF annotation app, these options are great for planners in PDF format.
What Devices Work Best?
The beauty of digital planners is that you can use them on multiple devices. Here’s a quick guide:
- Tablets (e.g., iPad with Apple Pencil or Android tablets): These give you the full experience, especially if you love handwriting your notes and planning on the go.
- Laptops/Desktops: Great for when you’re doing detailed planning or working on larger screens. Perfect for professionals or students.
- Smartphones: Ideal for checking your schedule on the fly, making quick notes, or checking off tasks while you’re out and about.
How Do Digital Planners Work?
Most digital planners come in PDF format, which makes them easy to import into apps like GoodNotes or Notability. These planners are often filled with interactive hyperlinks, allowing you to quickly navigate between different sections – like your daily to-do lists, weekly overviews, or monthly calendars.
Once inside your app, you can either write by hand (with a stylus) or type directly into the planner. The flexibility is unmatched! Want to move a task to a different day? Just drag it over. Need more space on a page? Add a new note or insert an image. And don’t forget about the stickers, you can add fun little images to make planning more engaging!
Who Can Benefit from a Digital Planner?
The better question is: Who can’t? Here’s a quick look at how different people can use digital planners to simplify their lives:
- Busy Professionals: Manage meetings, projects, and deadlines like a pro. No more forgetting important tasks!
- Students: Track assignments, exams, and study schedules. Never miss a deadline!
- Parents: Organize family events, chores, and activities. Coordinate everyone’s schedules in one place!
- Entrepreneurs & Freelancers: Keep track of clients, goals, and projects without ever losing sight of your deadlines.
- Creatives: Use your digital planner as a blank canvas for doodles, designs, and creative notes.
Types of Digital Planners
Just like paper planners, digital planners come in all shapes and sizes. Here are some common types to help you find your perfect match:
- All-in-One Planners: These have everything – daily, weekly, and monthly pages, along with extra features like fitness trackers, meal planners, and even budgeting tools.
- Niche Planners: Focused planners for specific needs, such as fitness, finances, or academics.
- Undated Planners: These let you start anytime without worrying about wasted pages. Perfect for those who prefer flexibility.
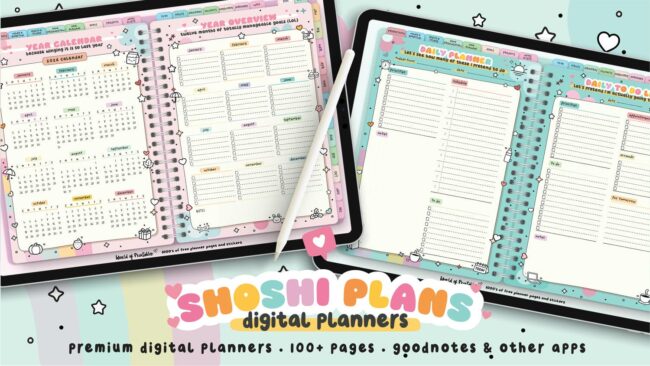
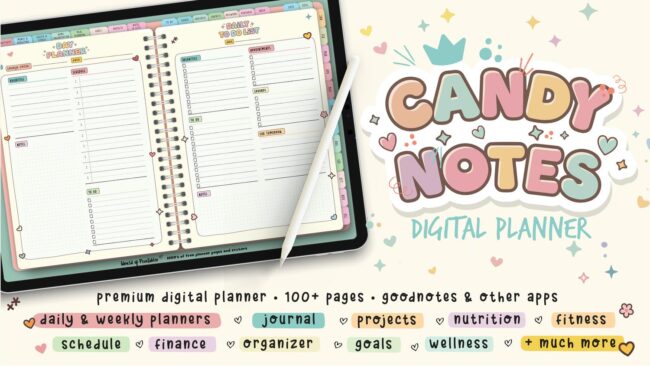
Check out our Love & Pixels hub to see the full range of planners available, and choose one that’s perfect for you!
Ready to Go Digital?
Making the switch to a digital planner can feel like stepping into the future of organization! With endless customization options, eco-friendly benefits, and the ability to sync across all your devices, a digital planner is the ultimate tool to help you stay organized, no matter where life takes you.
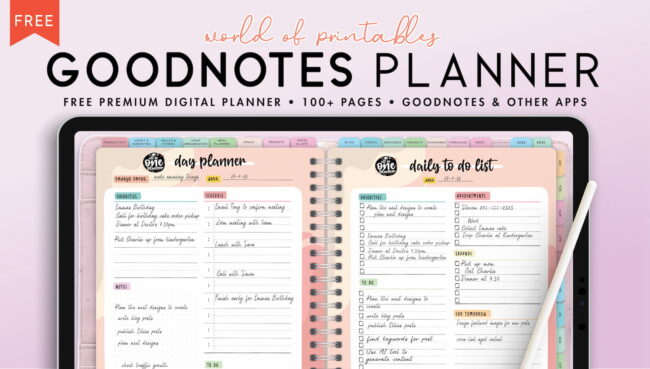
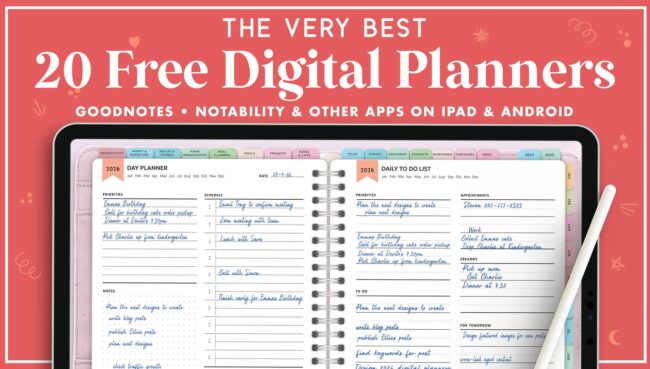
Now that you’ve got the scoop, what are you waiting for? Dive into the world of digital planning and transform the way you organize your life. Check out our free digital planners to get started!
Getting Started with Digital Planners: The Basics
So, you’re ready to start your journey into the world of digital planners! Whether you’re completely new to the concept or just need a little help getting set up, this guide will walk you through everything from setting up your planner to navigating your first week of planning. Let’s jump right in!
How to Set Up Your Digital Planner
Setting up your digital planner is a breeze. Here’s how to get started, step by step:
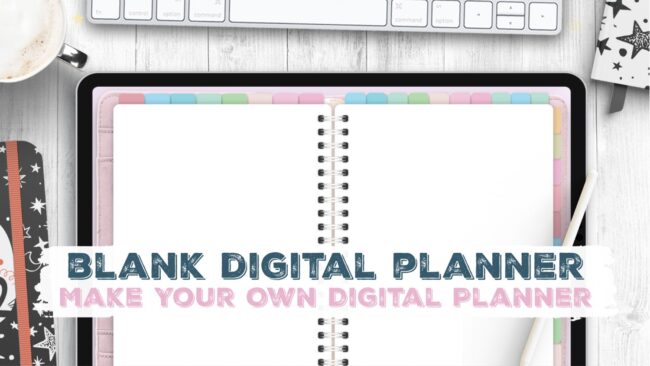
- Choose Your Planner:
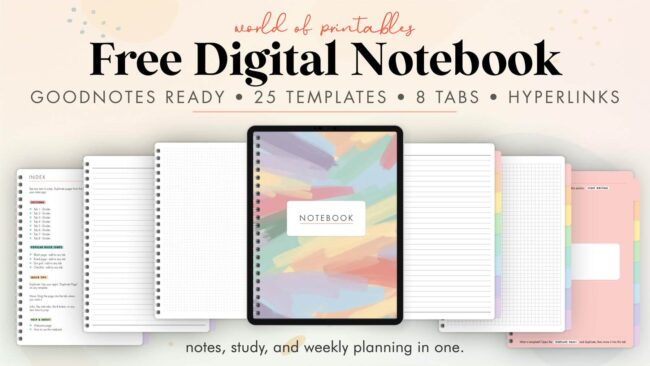
- You can get a ready-made digital planner (we have some great free ones to check out!) or you can create your own if you’re feeling crafty! Or get a Digital Notebook for simple note-taking.
- Pick Your App:
- Once you’ve got your planner, choose a note-taking app that supports PDF annotation. Popular options include GoodNotes, Notability, ZoomNotes, or PDF Expert. For this example, we’ll focus on GoodNotes (but the general steps apply to most apps).
- Import Your Planner:
- Download your digital planner PDF, then open your chosen app. In GoodNotes, for example, tap the ‘+’ symbol, select ‘Import’, and choose the planner file from your downloads. Voila! Your planner is now ready to use.
- Personalize Your Planner:
- Many planners come with customization options. Add your name, adjust the font and color schemes, or even drop in some digital stickers to give it a personal touch.
- Some planners have hyperlinked tabs that let you jump between sections (e.g., from daily to weekly views). Try tapping these links to familiarize yourself with the layout.
- Choose Your Stylus:
- If you’re using a tablet, grab a stylus (like the Apple Pencil for iPads) for a smooth handwriting experience. If you prefer typing, simply tap the screen and type directly into the text boxes.
- Backup Your Planner:
- Don’t forget to back up your planner to the cloud (via iCloud, Google Drive, or Dropbox) so your hard work is safe. This ensures you can access your planner on multiple devices or recover it if something happens to your device.
Navigating Your Planner: Basic Functions
Now that you’ve set up your digital planner, it’s time to dive into the basic functions. Here’s a quick guide on how to use your planner efficiently:
- Writing vs. Typing:
- One of the best things about digital planners is flexibility! You can either handwrite your notes (for that natural, paper-like experience) or type. In most apps, you can switch between the two seamlessly.
- Try experimenting with both to see what works best for you. Some people love the act of handwriting for daily to-do lists, while others prefer typing for speed.
- Using Hyperlinks:
- Many digital planners come with interactive hyperlinks that make navigation between different sections a breeze. These are clickable areas (often at the top or side of the page) that help you jump from your monthly overview to a specific day or week without needing to scroll endlessly.
- Pro Tip: Test out the hyperlinks to get used to navigating between sections like Daily, Weekly, and Monthly views.
- Adding Digital Stickers:
- Want to make your planner fun and vibrant? Try adding digital stickers! Many planners come with pre-made stickers or space for you to add your own.
- In GoodNotes, for example, you can add an image, resize it, and place it anywhere on the page. Stickers can be great for highlighting important dates or adding a bit of fun to your to-do list.
- Erasing & Editing:
- One of the biggest advantages of digital planners is the ability to make changes quickly. Whether you need to erase, rearrange, or completely redo a section, you can do it easily without the mess.
- The eraser tool lets you clean up mistakes, while the lasso tool allows you to move elements around the page.
- Navigating Pages:
- Use the ‘thumbnail’ view in most apps to see an overview of your planner’s pages. This is especially helpful if you want to jump between sections quickly.
- Bookmark important pages you want to revisit often, such as your yearly goals or project planning sections.
Choosing the Right Planner for Your Needs
Finding the right digital planner for you is key to staying organized. Here are some tips to help you pick the best option based on your lifestyle and needs:
- Daily vs. Weekly vs. Monthly Planners:
- Daily Planners are ideal for people who have a lot of detailed tasks to tackle each day, such as project managers, students, or busy parents.
- Weekly Planners offer a more zoomed-out view of your week, helping you see deadlines and appointments without overwhelming you with too much detail. Great for people with regular work or family schedules.
- Monthly Planners are perfect for long-term planning and seeing the bigger picture. Ideal for setting goals, planning events, or managing multiple projects.
- All-in-One Planners:
- These planners offer everything from daily pages to habit trackers, goal-setting sheets, budgeting templates, and even meal planning sections. If you like having everything in one place, an all-in-one planner is perfect for you.
- They are great for those who like to plan multiple aspects of their life, like managing home, work, health, and family all in one space.
- Niche Planners:
- If you’re looking for a planner focused on a specific goal, like fitness, academic planning, or financial tracking, consider a niche planner. These planners are designed to target one aspect of life, so you can dive deep into tracking progress.
- For example, a fitness planner may include workout logs, nutrition tracking, and progress charts, while an academic planner can track assignments, deadlines, and class schedules.
- Dated vs. Undated Planners:
- Dated Planners are perfect for users who want to stay aligned with the current year. They help keep everything in sync, especially if you prefer having deadlines that correspond with the calendar year.
- Undated Planners offer more flexibility and allow you to start planning anytime, without worrying about wasting unused pages. These are great for people who like to plan at their own pace.
Starting Your First Week of Digital Planning
Now that you know how to set up and navigate your planner, it’s time to jump into the action! Here’s how to use your digital planner for your first week:
- Set Up Your Weekly Spread:
- Start by filling in any important deadlines, appointments, or meetings for the week ahead. Use different colors or highlighters to distinguish between categories (e.g., work tasks, personal goals, family events).
- Add Daily To-Dos:
- Break down your weekly tasks into smaller daily to-dos. Digital planners make it easy to rearrange tasks if you don’t finish them, so don’t feel pressured to over-plan.
- Use a Time-Blocking Technique:
- Consider time-blocking to manage your day more effectively. Assign specific times to each task or category (e.g., work, exercise, family) and block them out in your daily planner. This helps you stay focused on one task at a time.
- Track Habits or Goals:
- If your digital planner includes a habit tracker, start monitoring daily habits like water intake, exercise, or reading. This will help you stay accountable and track progress throughout the week.
- Review Your Week:
- At the end of the week, review what worked and what didn’t. Digital planners make it easy to reflect and adjust your planning style as needed. If something didn’t get done, simply move it to the next week!
Getting started with a digital planner may seem a bit intimidating at first, but with these basics in place, you’ll be navigating your planner like a pro in no time. It’s all about experimenting, finding what works for you, and customizing it to fit your life.
Tips for Using Digital Planners Efficiently
Once you’ve got the hang of setting up and navigating your digital planner, the next step is mastering how to use it efficiently. Whether you’re managing a busy schedule, tracking goals, or simply trying to stay organized, these tips will help you optimize your digital planner and ensure it becomes an indispensable part of your life. Let’s dive into the best ways to supercharge your planning!
How to Plan Your Day, Week, and Month Effectively
Planning can sometimes feel overwhelming if you’re not sure where to start. Here’s a step-by-step guide for creating a planning routine that helps you stay on track and get the most out of every day, week, and month:
Daily Planning:
- Set Priorities: Begin each day by identifying your top three priorities. These are the key tasks that, if completed, will make your day feel successful. Highlight them at the top of your daily to-do list.
- Break Down Tasks: For larger tasks, break them down into smaller, more manageable chunks. This helps you make consistent progress without feeling overwhelmed.
- Time Blocking: Schedule specific time blocks for each task. For example, dedicate 9:00 AM to 11:00 AM for work-related tasks, 12:00 PM to 1:00 PM for lunch and errands, and so on. This method helps you stay focused and prevents tasks from spilling over into other parts of your day.
- Review Your Day: At the end of each day, review what you accomplished, and shift any incomplete tasks to the next day. Reflect on what went well and where you might improve.
Weekly Planning:
- Set Weekly Goals: On Sundays or Mondays, take a few minutes to set your goals for the week. These can be related to work, personal projects, fitness, or even self-care. Write them down in your weekly overview section.
- Divide Your Goals: Break down your weekly goals into daily tasks. This ensures you’re consistently working toward your goals throughout the week.
- Add Flexibility: Leave space in your weekly planner for unexpected tasks or rescheduling. Digital planners make it easy to drag and drop tasks to new dates if things don’t go as planned.
- Theme Your Days: If you juggle multiple responsibilities, consider theming your days. For instance, Monday can be for work projects, Tuesday for family planning, Wednesday for creative pursuits, and so on. This reduces decision fatigue and keeps your week more focused.
Monthly Planning:
- Set Monthly Goals and Intentions: At the beginning of each month, write down your larger goals and intentions. Whether it’s health, career, or personal development, this gives you a sense of direction for the month.
- Plan Big Events: Add in important dates like birthdays, meetings, deadlines, or vacations at the start of the month. This gives you an overview of when you’ll be busy and helps you avoid overcommitting.
- Reflect and Adjust: At the end of each month, spend some time reviewing your progress. Did you achieve your goals? What can you improve for the next month? Use this time to reset for the month ahead.
Time-Blocking in Digital Planners
One of the most effective ways to stay productive is by using time-blocking – a method where you schedule blocks of time for specific tasks. Here’s how to do it efficiently with your digital planner:
- Start with a Daily Template: Many digital planners come with pre-made daily layouts where you can assign tasks to specific time slots. If yours doesn’t, create your own by drawing lines or boxes to indicate time blocks.
- Block Time for Similar Tasks: Group similar tasks into the same time block to improve efficiency. For example, you could dedicate one block of time in the morning to answer emails, another block for meetings, and the afternoon for deep work on projects.
- Include Breaks: Don’t forget to schedule breaks! A five-minute break after every hour of work or a longer break during lunchtime will help prevent burnout and keep your productivity high.
- Use Color Coding: Assign different colors to each type of task or category. For instance, work-related tasks can be blue, family events green, and personal time yellow. This makes it easier to scan your planner and get a quick overview of your day.
- Stick to Your Blocks: The key to time-blocking success is sticking to the blocks. If a task takes longer than expected, don’t let it spill over into the next block – either move the task to another block or finish it within the allocated time.
- Reflect and Adjust: After each day or week, review how your time-blocking went. Did you overestimate or underestimate the time needed for tasks? Adjust your blocks accordingly for future planning.
Daily Planning Routine for Success
Building a consistent daily planning routine can transform how you approach your day. Here’s how to create a routine that sets you up for success:
- Morning Planning Session:
- Start your day with a quick review of your planner. Check what tasks are on your to-do list, and update any changes from the previous day.
- Set your top three priorities for the day and time-block them into your schedule. This ensures you focus on the most important things first.
- If your planner has a gratitude section or a space for affirmations, fill that out during your morning session to set a positive tone for the day.
- Evening Review:
- Before winding down for the night, review your day. Did you complete your top priorities? What tasks need to be carried over to the next day?
- Adjust your planner for the following day based on any new deadlines or events that came up.
- Use the evening session to reflect on your productivity and consider what worked well and what you can improve.
- Consistency is Key: The more consistent you are with your daily planning routine, the more effective it becomes. Even if you only have five minutes in the morning or evening, commit to reviewing your planner daily.
Tracking Goals and Habits
One of the most powerful features of digital planners is the ability to track both short- and long-term goals, as well as daily habits. Here’s how to make the most of this:
- Set SMART Goals: When setting goals in your digital planner, make sure they’re SMART (Specific, Measurable, Achievable, Relevant, and Time-bound). For example, instead of setting a vague goal like “exercise more,” try “exercise for 30 minutes, three times a week.”
- Use Habit Trackers: Many digital planners come with built-in habit trackers where you can log daily habits such as water intake, exercise, reading, or meditation. This makes it easy to visualize your progress and spot patterns.
- Celebrate Small Wins: Every time you meet a goal or successfully stick to a habit, take a moment to celebrate your win. Use stickers, colors, or notes in your planner to mark completed goals or milestones.
- Adjust Goals as Needed: If you’re consistently falling short of a goal or struggling with a habit, don’t be afraid to adjust. Digital planners make it easy to modify goals without having to start from scratch.
- Monthly Goal Review: At the end of each month, review your progress. Which goals did you achieve? Which habits stuck, and which need more work? Use this review session to plan for the next month.
Make the Most of Your Digital Planner’s Features
Maximizing the features of your digital planner will help you stay organized and get more done:
- Use Hyperlinks for Fast Navigation: If your planner includes hyperlinks, get into the habit of using them to quickly jump between sections. This will save time compared to scrolling through multiple pages.
- Create Templates for Repetitive Tasks: If you have weekly or monthly tasks that repeat (like meeting agendas, grocery lists, or workout plans), create templates that you can copy and reuse. Many apps allow you to duplicate pages easily.
- Sync Your Planner Across Devices: Make sure your planner syncs across all your devices, so you can access it wherever you are, whether you’re at your desk or on the go. Apps like GoodNotes or Notability offer cloud-syncing options to ensure your planner is always up-to-date.
- Utilize Digital Stickers: Digital stickers aren’t just for fun, they can be functional too. Use icons, labels, and checkmarks to organize your planner and make key tasks stand out visually.
- Track Important Dates and Reminders: Use the reminder feature in your planner app to set alerts for important dates or deadlines. This ensures you never miss an appointment or due date.
Using your digital planner efficiently takes some practice, but once you master these techniques, it will become a powerful tool to keep your life organized, productive, and stress-free. By integrating daily, weekly, and monthly planning routines, along with features like time-blocking, goal setting, and habit tracking, you’ll be well on your way to planning success!
Organizing Your Life with Digital Planners
Digital planners are more than just tools for jotting down appointments, they can help you organize every aspect of your life. Whether you’re juggling work, family, personal goals, or managing your finances, a well-structured digital planner can become the all-in-one solution that keeps everything on track. Here’s how you can use your digital planner to create order and balance across your personal and professional life.
How to Create a Family Planner
Managing a family can feel like running a small business, there are schedules, tasks, and important events to track. A family planner can help you organize family life, making it easier to coordinate activities and stay on top of everyone’s responsibilities.
Set Up a Family Schedule:
- Create a Family Calendar: Use your digital planner to create a family calendar. This is where you can track all family events, from school activities to doctor’s appointments, vacations, and special occasions.
- Tip: Use different colors for each family member. This way, you can quickly identify who has what planned for the day or week.
- Chore Charts and Responsibilities: Add a weekly chore chart to your family section. Use the planner to assign and track chores for each family member. Make it fun by adding reward stickers or creating a points system to encourage kids to complete their tasks.
- Meal Planning: Include a meal planning section where you can schedule family dinners and track what groceries are needed. You can even keep a list of favorite family recipes for easy reference when planning meals.
- Family Budget: Add a family budgeting page to track household expenses. Use it to monitor bills, savings goals, and allowances for children, making sure everyone is aware of the financial responsibilities.
Track Important Events:
- Keep track of birthdays, anniversaries, and other significant family events by marking them on your calendar. Set reminders ahead of time to prepare for these celebrations.
Emergency Information:
- Create a section in your planner dedicated to emergency contact information, medical records, or important family documents. Having these details organized in your planner ensures quick access when needed.
Work-Life Balance Planning
Balancing work and personal life can be challenging, but with a well-organized digital planner, you can create boundaries and structure your time to achieve a healthy work-life balance.
Set Up Work and Personal Sections:
- Create Separate Sections: Dedicate specific pages or sections of your planner to both work and personal life. This helps you stay focused on each without letting tasks overlap.
- Work Section: Use this area for meetings, projects, deadlines, and tasks.
- Personal Section: Track personal goals, appointments, and downtime.
- Daily & Weekly To-Dos: In your work section, set up daily and weekly to-do lists. Prioritize your most important work tasks while leaving space for personal goals and self-care in your personal section.
Schedule Downtime:
- Block out time in your planner for personal activities, family time, and relaxation. Treat these as non-negotiable appointments, just like work meetings, to ensure you’re giving yourself space to recharge.
Time Blocking for Work & Personal Tasks:
- Use time blocking to set specific hours for work and personal tasks. For example, you can schedule work hours between 9:00 AM and 5:00 PM, and then block out 5:00 PM to 7:00 PM for family dinner and relaxation. This helps create boundaries between work and personal life.
Reflect and Adjust:
- At the end of each week, use your planner to reflect on how well you balanced work and personal time. Did you feel overwhelmed with work? Did you spend enough time on self-care? Adjust your schedule for the following week accordingly.
Meal Planning & Grocery Lists
One of the most practical uses for your digital planner is meal planning. By dedicating a section of your planner to weekly meal prep and grocery lists, you can save time, reduce stress, and stay organized in the kitchen.
Weekly Meal Planner:
- Create a Meal Plan Template: Add a meal planning template to your digital planner where you can schedule breakfast, lunch, and dinner for each day of the week. You can easily copy and paste this template for each new week.
- Plan Ahead: On Sundays, plan your meals for the upcoming week. Consider your family’s schedule and dietary preferences when creating your menu.
- Rotate Favorite Meals: If you have a list of family-favorite meals, rotate them into your weekly plan to avoid decision fatigue.
Grocery Lists:
- Grocery List Templates: Use your digital planner to create reusable grocery list templates. As you plan meals for the week, add the necessary ingredients to your grocery list. You can check off items directly from your planner as you shop.
Track Food Inventory:
- Use your planner to keep track of your pantry and freezer inventory. This helps you avoid buying duplicates and ensures that you’re using up items before they expire.
Meal Prep Notes:
- Add a section for meal prep notes where you can jot down tips, batch cooking ideas, or recipes you want to try. Keeping everything in one place makes meal planning and preparation much more efficient.
Project Planning & Goal Setting
Whether you’re managing a personal project, a work-related task, or a long-term goal, your digital planner can become a hub for tracking progress, deadlines, and milestones.
Set Up a Project Planner:
- Create a Project Timeline: For each project, create a timeline with milestones, deadlines, and important deliverables. You can use a Gantt chart-style layout in your planner to visualize the project’s progress.
- Task Breakdown: Break down the project into smaller, actionable steps. Use your planner to assign due dates and track each task’s completion.
- Goal Tracking: If your project is part of a larger goal (e.g., completing a course, starting a business), use your planner to track your progress toward that goal. Break the goal into mini-goals and milestones, and review them regularly to stay on course.
Use Color Coding:
- Color-code your project planner to differentiate between tasks, deadlines, and priority levels. This will make it easier to quickly scan and see what’s coming up next.
Review and Adjust:
- Regularly review your project’s progress in your digital planner. If deadlines are shifting or tasks are taking longer than expected, adjust your plan accordingly.
Finance & Budgeting Planning
Managing your finances can be a daunting task, but with your digital planner, you can simplify budgeting, track spending, and set financial goals all in one place.
Set Up a Budget Tracker:
- Monthly Budget: Create a monthly budget page in your digital planner. Track your income, fixed expenses (like rent or bills), variable expenses (like groceries or entertainment), and savings goals. You can use templates or create your own custom layout.
- Expense Tracking: Dedicate a section of your planner to track daily expenses. Categorize your spending (e.g., groceries, dining, entertainment) and tally it up at the end of each week to see where your money is going.
- Savings Goals: Use your planner to set savings goals. Whether it’s for an emergency fund, a vacation, or a big purchase, break down your goal into manageable monthly contributions and track your progress.
Debt Management:
- If you’re working on paying off debt, use your planner to track payments, interest rates, and payoff timelines. Seeing your progress visually can be incredibly motivating.
Bill Tracker:
- Add a bill tracker page where you can log all your monthly bills, their due dates, and whether they’ve been paid. Set up automatic reminders so you never miss a payment.
Personal Development & Wellness
Your digital planner can also be a valuable tool for tracking your personal development and wellness goals. From fitness tracking to mindfulness, here’s how to use your planner for personal growth.
Fitness Tracking:
- Set Fitness Goals: Add a fitness section to your planner where you can log your exercise goals, workout routines, and progress. Whether you’re aiming to run a 5K, build muscle, or practice yoga daily, tracking your workouts helps keep you motivated.
- Create a Workout Log: Use your digital planner to track each workout, what exercises you did, how long you worked out, and how you felt afterward. This helps you stay accountable and measure progress over time.
Mental Wellness & Mindfulness:
- Add sections for journaling, daily affirmations, or gratitude logs to promote mental wellness. Taking a few minutes each day to write down what you’re grateful for or reflect on your emotions can have a huge impact on your mental health.
Habit Tracking:
- Create a habit tracker for wellness goals like drinking enough water, meditating, or getting enough sleep. Visualizing your progress can help you stay consistent.
Organizing your life with a digital planner is all about creating systems that make everyday tasks more manageable. Whether you’re planning for your family, managing work-life balance, or setting personal goals, your digital planner can be customized to fit every aspect of your life. By implementing these tips, you’ll be well on your way to mastering the art of organization and enjoying the benefits of a more structured, intentional lifestyle.
Advanced Digital Planner Features & Customizations
Once you’ve mastered the basics of digital planning, it’s time to explore the advanced features and customization options that can make your planner uniquely yours and supercharge your productivity. These features go beyond simple planning, allowing you to turn your digital planner into an all-in-one hub for organizing your entire life.
Let’s dive into some fun and functional customizations, advanced tools, and insider tips that will help you make the most out of your digital planner.
Using Digital Stickers and Add-Ons
One of the most exciting aspects of digital planners is the ability to add digital stickers and other add-ons to make your planner more engaging, fun, and visually appealing. Here’s how to get started:
What Are Digital Stickers?
- Digital stickers are images or icons that you can insert into your planner to highlight tasks, events, or notes. They work just like physical stickers in a paper planner, but with the added bonus of being reusable, resizable, and completely customizable.
How to Use Digital Stickers:
- Download Sticker Packs: You can find sticker packs online, including free and paid options. Some apps, like GoodNotes, even offer built-in sticker packs. Once downloaded, you can import them into your planner.
- Add Stickers to Your Planner:
- In most apps, such as GoodNotes or Notability, simply import the sticker as an image and drag it to the desired spot in your planner. You can resize, rotate, or move it around as needed.
- Use Stickers for Functionality:
- Stickers aren’t just for decoration. Use them as icons for tasks (e.g., a coffee cup sticker for a coffee meeting) or as labels for important deadlines (e.g., a star icon to mark priority tasks). You can also use checkmark stickers to track completed tasks.
- Create Your Own Stickers: If you’re feeling creative, you can design your own stickers using apps like Procreate, Canva, or Photoshop. This is a great way to add a personal touch to your planner.
- Sticker Ideas:
- Priority stickers for high-priority tasks.
- Event stickers for birthdays, holidays, or vacations.
- Habit stickers to motivate progress (e.g., water intake, workouts).
- Mood trackers using different smiley faces or emotions to track how you feel each day.
Customizing Pages and Layouts
One of the biggest advantages of digital planners is the ability to customize layouts and add pages to fit your specific needs. Unlike paper planners, where you’re stuck with a pre-printed layout, digital planners are highly adaptable.
How to Customize Layouts:
- Duplicate Pages: If you have a layout that you like (e.g., a daily task page or a weekly spread), you can easily duplicate it for future use. This saves time and ensures consistency.
- Create Custom Sections: Add new pages for unique sections like project planning, meal prep, budgeting, or even a vision board. Digital planners allow you to insert additional pages anywhere you need them.
- Use Templates: Many digital planners come with pre-designed templates, but you can also create your own custom templates or download additional ones online. For example, if you have a fitness goal, you could create a workout tracking template.
- Incorporate Your Branding: If you’re a business owner or content creator, personalize your planner by incorporating your brand colors, fonts, and even your logo.
Creating Custom Pages:
- Habit Trackers: Add a habit tracker page to monitor habits like exercise, water intake, or reading. You can create a grid with checkboxes for each day of the week.
- Project Planners: Design a project management layout with sections for deadlines, milestones, and to-do lists specific to each project.
- Meal Planners: Create a weekly meal plan page with spaces for each meal of the day and a corresponding grocery list.
Personalizing Your Pages:
- Colors & Fonts: Change up the color scheme of your planner by using different highlighter tools or text colors. Some apps allow you to import custom fonts to add even more personalization.
- Backgrounds: Use different backgrounds or grid layouts for certain sections. For instance, you could use a dot-grid layout for sketching or brainstorming, while keeping your daily planning pages clean and simple.
Syncing Across Devices
One of the most powerful features of digital planners is the ability to sync your planner across multiple devices. Whether you’re switching between your tablet, smartphone, or computer, syncing ensures that your planner is always up-to-date, no matter where you are.
How to Sync Your Planner:
- Use Cloud Services: Most digital planning apps allow you to sync your planner to cloud services such as iCloud. By enabling this feature, you can access your planner from any device.
- Cross-Device Planning:
- Syncing allows you to start planning on your tablet and later make adjustments on your phone or laptop. For example, if you’re out and need to update an appointment, you can do it on your phone, and it will automatically sync with your main planner on your tablet.
Syncing Tips:
- Enable Auto-Sync: Popular apps like GoodNotes have an auto-sync feature that keeps everything updated without requiring manual backups.
- Test Syncing Across Devices: Make sure your planner is properly synced by testing it across multiple devices. Add an event on one device and confirm that it shows up on the others.
- Backup Regularly: While syncing helps keep your planner up-to-date, regular backups ensure that you won’t lose any data if something goes wrong with your cloud service or device.
Tracking Goals and Habits
If you’re looking to be more goal-oriented, your digital planner can become a powerful tool for goal-setting and habit tracking. This is where the flexibility and customization of digital planners really shine.
Setting SMART Goals:
- Use SMART Criteria: Set goals that are Specific, Measurable, Achievable, Relevant, and Time-bound. For example, instead of saying, “Get fit,” set a goal like, “Work out for 30 minutes, three times a week for the next two months.”
- Break Down Big Goals: For larger, long-term goals, break them down into smaller, actionable steps. Use your planner to track each step, setting deadlines and tracking your progress along the way.
Using Habit Trackers:
- Create Custom Habit Trackers: Add a habit tracking page to your digital planner where you can monitor daily habits such as water intake, exercise, or meditation. You can use a grid with checkboxes or even create a colorful visual chart.
- Visualize Progress: Visual habit trackers make it easy to spot trends. For example, you could use color coding (e.g., green for completed habits, red for missed habits) to visualize how consistent you’ve been.
- Celebrate Wins: Every time you reach a milestone or complete a habit streak, take a moment to reward yourself. You can mark this in your planner by adding motivational stickers, stars, or celebratory notes.
Tracking Long-Term Goals:
- Goal Planning Pages: Create dedicated pages for each goal where you can map out steps, timelines, and resources needed. Regularly review these pages to ensure you’re making progress.
- Monthly Reviews: At the end of each month, use your digital planner to review your goals and assess whether you need to adjust timelines, shift priorities, or take further action.
By unlocking these advanced features and customization options, you’ll transform your digital planner into a powerful, personalized tool that not only organizes your life but also helps you reach your goals and streamline daily tasks. The beauty of digital planners lies in their flexibility, so don’t be afraid to experiment, customize, and automate to make your planning experience uniquely yours!
Common Digital Planner Mistakes & How to Avoid Them
As amazing as digital planners are, it’s easy to fall into some common traps that can hinder your productivity or cause frustration. Whether you’re new to digital planning or a seasoned user, these are some of the most frequent mistakes people make – and, more importantly, how you can avoid them to make your digital planner work for you rather than against you.
Mistake #1: Overloading Your Planner with Too Many Tasks
The Problem:
Many users start with the best intentions and fill their daily, weekly, or monthly pages with an unrealistic number of tasks. While ambition is great, overloading your planner can lead to overwhelm and burnout when you’re unable to complete everything on your list.
How to Avoid It:
- Set Realistic Goals: Stick to 3-5 priority tasks per day, depending on your schedule. It’s better to complete a few high-priority tasks effectively than to leave a long list of incomplete tasks at the end of the day.
- Break Down Large Tasks: If you have a big project, break it down into smaller, more manageable steps. Instead of writing “Finish report,” break it down into “Research,” “Outline,” “Draft,” and “Edit.”
- Use Time-Blocking: Time-blocking can help ensure you’re not overcommitting. Allocate specific time slots for each task and be mindful of how much time you realistically have in a day.
Mistake #2: Failing to Review and Reflect
The Problem:
Many people get into the habit of planning their days or weeks but forget to review what they’ve accomplished. This means they may miss out on important lessons, fail to track their progress, or overlook incomplete tasks that need to be carried forward.
How to Avoid It:
- End-of-Day Review: Take five minutes at the end of each day to reflect on what you’ve accomplished. This helps you assess your productivity, celebrate wins, and plan any unfinished tasks for tomorrow.
- Weekly Review: Set aside 15-30 minutes at the end of the week to review what worked well and what didn’t. Are there patterns in tasks you tend to push off? Are there recurring distractions? Use this review to improve your planning for the following week.
- Monthly Goal Check-In: Each month, revisit your bigger goals. Are you making progress? What adjustments can you make to stay on track?
Mistake #3: Not Using Hyperlinks and Shortcuts
The Problem:
Digital planners come with amazing features like hyperlinks and shortcuts that make navigation fast and easy. However, some users fail to take full advantage of these, sticking to manual scrolling and flipping between pages. This can slow you down and make your planner feel more cumbersome.
How to Avoid It:
- Learn How to Use Hyperlinks: Spend some time getting familiar with your planner’s hyperlinks. Many digital planners are designed with clickable tabs or links that allow you to jump between sections quickly. For example, from your monthly overview directly to a specific daily page.
- Bookmark Key Sections: If your app supports bookmarking, mark key pages like your monthly goals or project lists so you can access them with a single tap.
- Use Search Functions: Most digital planner apps (such as GoodNotes and Notability) come with a search function, which allows you to quickly find tasks, notes, or appointments by keyword.
Mistake #4: Neglecting to Sync or Backup Your Planner
The Problem:
One of the best features of digital planners is their ability to sync across devices, so you can access your planner from your phone, tablet, or computer. However, some users forget to turn on syncing or backup features, putting their data at risk if something happens to their device.
How to Avoid It:
- Enable Syncing: Make sure you’ve enabled syncing with your chosen cloud service (iCloud, Google Drive, Dropbox, etc.). This way, any changes made on one device will automatically update on others.
- Backup Regularly: In addition to syncing, ensure you have a regular backup schedule. Some apps allow for automatic backups, but it’s a good habit to manually back up your planner at least once a week to a secure location.
- Test Syncing: After enabling syncing, periodically test it to ensure it’s working properly. For example, update a task on your phone and check that it appears on your tablet or computer.
Mistake #5: Using Too Many Different Tools
The Problem:
It’s easy to fall into the trap of using multiple tools for different tasks – one app for to-do lists, another for notes, yet another for tracking goals. This can create fragmentation, making it harder to stay organized and making your digital planner feel less useful.
How to Avoid It:
- Consolidate in One Place: Your digital planner should be your central hub for all aspects of your life. Use it for task management, notes, goals, and tracking instead of jumping between multiple apps.
- Integrate Other Tools Where Necessary: If you must use another tool (such as Google Calendar for appointments), ensure it’s properly integrated with your planner. For example, you can set up workflows in apps like Zapier to automatically create tasks in your planner when an event is added to Google Calendar.
- Stick to a Consistent System: Find a planning system that works for you and stick with it. Avoid the temptation to jump from one app to another or constantly try new tools. Consistency is key to staying organized.
Mistake #6: Over-Customizing and Spending Too Much Time on Aesthetics
The Problem:
Digital planners offer endless customization options, from color schemes to stickers, fonts, and layouts. While personalization is fun, spending too much time on aesthetics can lead to procrastination, with users focusing more on how the planner looks than on actually using it to stay organized.
How to Avoid It:
- Function First, Aesthetics Second: While it’s fine to personalize your planner, remember that its primary purpose is to help you stay organized. Focus first on building a system that works for you, then add personal touches later.
- Set Limits for Customization Time: If you enjoy decorating your planner, set aside specific times to do it (like at the end of the week). Avoid the trap of tweaking and decorating when you should be planning or completing tasks.
- Use Templates: Instead of starting from scratch, use ready-made templates for pages like habit trackers, meal planners, or project lists. This saves time and reduces the temptation to over-customize.
Mistake #7: Forgetting to Schedule Self-Care and Downtime
The Problem:
Many people use their planners to schedule work tasks, appointments, and obligations, but they often forget to carve out time for self-care, relaxation, or even hobbies. This can lead to burnout and frustration, as the planner becomes a tool for managing stress rather than helping to create balance.
How to Avoid It:
- Schedule Downtime Like a Task: Treat self-care and personal time with the same importance as a meeting or work task. Schedule time for activities like reading, exercising, or spending time with family in your planner.
- Use a Self-Care Tracker: Many digital planners include sections for tracking self-care routines, like sleep, exercise, or mindfulness practices. Use these to ensure you’re maintaining a healthy work-life balance.
- Set Boundaries: Avoid overbooking yourself. If you notice your planner is becoming overloaded with work and obligations, block out time for relaxation, hobbies, or social activities to create balance.
Mistake #8: Ignoring Goal Tracking and Habit Building
The Problem:
Some users set ambitious goals or create habit trackers in their planners but then fail to revisit them regularly. Without reviewing your goals and habits, it’s easy to lose focus and feel like you’re not making progress.
How to Avoid It:
- Regular Goal Check-Ins: Set weekly or monthly reminders to check in on your goals. Use your planner to track progress and make adjustments where necessary.
- Celebrate Small Wins: Acknowledge and celebrate when you reach milestones, no matter how small. Use stickers, notes, or color-coded progress bars to visualize your success.
- Incorporate Habit Tracking: Use your planner’s habit tracking features to monitor daily habits like exercise, water intake, or meditation. Make it a habit to review your trackers regularly and adjust your routine as needed.
Mistake #9: Not Setting Deadlines for Tasks
The Problem:
Without specific deadlines, tasks can easily fall through the cracks or get postponed indefinitely. It’s tempting to write down tasks without clear timelines, but this can lead to procrastination or missed opportunities.
How to Avoid It:
- Assign Due Dates to Every Task: When you add a task to your planner, always assign a due date or timeframe. This helps you prioritize tasks and ensures they don’t get overlooked.
- Use Reminders: If your planner app supports reminders, set up notifications for tasks with approaching deadlines. This keeps you accountable and on top of important deadlines.
- Break Down Long-Term Projects: For bigger projects, set multiple deadlines for different phases of the project. This prevents the project from becoming overwhelming and ensures you’re making steady progress.
By being aware of these common mistakes and implementing simple strategies to avoid them, you can use your digital planner more effectively and get the most out of your planning experience. Remember, the goal of a digital planner is to enhance your productivity and create balance, not to overwhelm you. Take a step back, simplify where needed, and let your planner help guide you toward your goals, one step at a time.
Digital Planner Tips & Tricks to Maximize Your Planner’s Potential
Now that you’ve familiarized yourself with the basics and advanced features of digital planners, it’s time to supercharge your experience with some clever tips and tricks. Whether you’re aiming to streamline your workflow, boost productivity, or add a creative flair to your planning, these strategies will help you get the most out of your digital planner.
Productivity Hacks Using Your Digital Planner
Boosting your productivity with a digital planner is all about implementing systems that keep you on track and organized. Here are some game-changing hacks to make your planner work harder for you.
Use the Pomodoro Technique:
- The Pomodoro Technique is a time management method where you work for a set amount of time (usually 25 minutes) and then take a short break (5 minutes).
- Create a Pomodoro tracker in your planner where you can log each session and track how many Pomodoros you complete in a day.
- You can even use digital stickers or icons to mark each Pomodoro cycle you finish. For example, you can place a checkmark or a timer sticker next to each completed session.
Time-Blocking for Maximum Efficiency:
- Time-blocking involves dividing your day into blocks of time where you focus on one task or a group of related tasks.
- Set up a time-blocking page in your planner where you allocate specific times for work, meetings, self-care, and relaxation. Color-code these blocks to quickly identify what’s next on your agenda.
- Add flexibility to your blocks. If a task takes longer than expected, have a buffer block you can shift tasks into without feeling like you’re falling behind.
The Eisenhower Matrix:
- The Eisenhower Matrix is a powerful decision-making tool that helps you prioritize tasks based on urgency and importance.
- In your digital planner, create a four-quadrant Eisenhower Matrix:
- Urgent and Important: Tasks to do immediately.
- Important, Not Urgent: Tasks to schedule for later.
- Urgent, Not Important: Tasks to delegate or outsource.
- Not Urgent, Not Important: Tasks to eliminate or defer.
- By categorizing your tasks using this matrix, you can quickly identify what needs immediate attention and what can be deferred.
- In your digital planner, create a four-quadrant Eisenhower Matrix:
Batch Similar Tasks:
- Instead of switching between tasks throughout the day, group similar tasks together. For example, schedule all your email responses, phone calls, and quick tasks in the same block of time. This reduces task-switching and helps you stay focused.
- Create a batching section in your planner to identify which tasks can be grouped together. Use icons or labels to quickly see which type of task belongs to each batch.
How to Plan for Long-Term Goals
Your digital planner can be a powerful tool for tracking and achieving long-term goals. Here’s how to effectively plan for months or even years in advance.
Break Down Big Goals:
- Start by setting SMART goals (Specific, Measurable, Achievable, Relevant, and Time-bound). For example, instead of “Get in shape,” make it “Exercise for 30 minutes, three times a week for six months.”
- In your planner, break these goals down into actionable steps. For example, for a fitness goal, schedule workouts on specific days and track progress weekly.
Use Milestones:
- For long-term goals, it’s essential to set milestones along the way. These are smaller achievements that bring you closer to your final goal. For example, if you’re writing a book, a milestone could be completing the first draft by a certain date.
- Create a milestone tracker in your planner where you can list each milestone and assign deadlines. As you hit each milestone, check it off or add a celebratory sticker.
Progress Reviews:
- Use your planner to conduct regular goal reviews. Set a recurring reminder to assess your progress monthly or quarterly. Are you on track? Do you need to adjust your timeline or approach?
- Create a review page where you can reflect on your progress and plan your next steps. Use this time to tweak your goals and make adjustments where necessary.
Vision Boards:
- Some digital planners include or allow you to create digital vision boards – visual representations of your goals and dreams.
- Create a page in your planner where you can add images, quotes, and inspiration related to your long-term goals. This will serve as a constant reminder of what you’re working toward.
Digital Planning for Mental Health and Well-Being
Digital planners aren’t just for tasks and deadlines, they can also be valuable tools for tracking your mental health and promoting well-being.
Gratitude Journaling:
- Gratitude journaling is a proven way to improve your mindset and overall well-being. Dedicate a section of your planner to a gratitude journal where you can write down 3-5 things you’re grateful for each day.
- Use stickers, drawings, or emojis to make your gratitude entries fun and visually appealing.
Mood Tracking:
- Set up a mood tracker in your planner where you can log how you’re feeling each day. This can help you identify patterns in your emotions and better understand your mental health.
- You can use color coding (e.g., blue for calm, yellow for happy, red for stressed) or icons to represent different moods. At the end of the month, review your mood patterns and reflect on what might be contributing to each.
Mindfulness Reminders:
- Schedule mindfulness breaks into your day by adding short reminders in your planner to pause, breathe, and reflect. These can be as simple as a five-minute meditation or a quick walk outside.
- Use your planner to track your mindfulness habits and log any positive effects you notice, such as increased focus or reduced stress.
Self-Care Checklist:
- Create a self-care checklist in your planner to ensure you’re prioritizing your well-being. This can include daily tasks like drinking enough water, taking breaks, or doing something you enjoy.
- Add a habit tracker to monitor how consistently you’re practicing self-care. Visualizing your progress can be a great motivator.
Maximizing Efficiency with Hyperlinks and Shortcuts
One of the most powerful features of digital planners is the ability to use hyperlinks and shortcuts for faster navigation. Here’s how to make sure you’re using them to their full potential.
Use Built-In Hyperlinks:
- Most digital planners come with pre-built hyperlinks that allow you to jump between sections, such as moving from the monthly overview to a specific daily page with a single tap.
- Take a few minutes to explore the hyperlinks in your planner so you know exactly how to navigate quickly between different sections.
Add Custom Hyperlinks:
- If your planner or app allows it, create your own custom hyperlinks to pages or sections you visit frequently. For example, link your weekly overview to specific project pages or habit trackers.
- This can save you time by eliminating the need to scroll or manually search for important sections.
Bookmark Important Pages:
- Use your planner’s bookmarking feature to quickly jump back to important pages like your goals, projects, or meeting notes. Bookmarking key sections can streamline your workflow, especially when working on long-term projects.
Create Shortcut Pages:
- Design a shortcut page in your planner where you link to all your most-used sections (e.g., daily to-do lists, fitness tracker, meal planner, or notes). This hub page can serve as a home base for your most important tasks.
Creative Journaling and Brainstorming with Your Planner
Your digital planner can double as a creative space for brainstorming ideas, doodling, or freewriting. Here’s how to use it for creativity and inspiration:
Brain Dump Pages:
- Add a dedicated page in your planner for brain dumps, where you can jot down random thoughts, ideas, or tasks that pop into your head. This helps clear your mind and keeps all your ideas in one place for later organization.
- Periodically review your brain dump page to identify any ideas worth developing or actions you need to take.
Mind Mapping:
- Mind mapping is a visual way of brainstorming ideas around a central concept. Use your planner to create a mind map for personal projects, work tasks, or creative ideas.
- Many digital planner apps have drawing tools that allow you to create connections between ideas. You can also add color or stickers to represent different branches of your mind map.
Sketching and Doodling:
- Use the blank pages of your digital planner for sketching or doodling. You don’t need to be an artist, doodling can help spark creativity and give your mind a break from structured tasks.
- Use this space for visualizing goals, sketching out ideas, or even just to relax and let your mind wander.
Journaling Prompts:
- Incorporate journaling prompts into your daily or weekly planning routine. These prompts can help you reflect on personal growth, clarify your thoughts, or explore creative ideas.
- Examples of journaling prompts include: “What did I learn this week?”, “What challenges did I face today?”, or “How can I be more creative this month?”
Using Your Planner as a Personal Dashboard
Transform your digital planner into a personal dashboard that gives you an overview of everything you need to know at a glance.
Create a Custom Dashboard:
- Dedicate the first page of your planner to a personal dashboard that includes your daily to-do list, top three priorities, upcoming appointments, and habit tracker.
Daily, Weekly, and Monthly Overviews:
- Your dashboard can have quick links to daily, weekly, and monthly overviews, giving you instant access to your most important planning sections.
- Use color-coded charts or visual aids to track progress on long-term goals, whether they’re related to work, fitness, or personal development.
Integrate Work and Personal Life:
- If you manage both work and personal tasks in your digital planner, your dashboard can be a one-stop overview for both. Include quick links to work projects, personal goals, and family schedules, so you’re always in the loop.
By implementing these tips and tricks, you can take your digital planner to the next level. Whether it’s optimizing your productivity, achieving long-term goals, improving mental health, or adding creative flair, your planner has the potential to become an all-encompassing tool for organizing, inspiring, and guiding your daily life. Experiment with these techniques and find what works best for you, before long, your digital planner will be an indispensable part of your routine.
Digital Planner FAQs
How do I make a digital planner work for me?
Digital planners are incredibly versatile, but finding the right approach for you is key. Here are some steps to ensure your planner works for your unique lifestyle and needs:
- Start Simple: If you’re new to digital planning, don’t overwhelm yourself by trying to do everything at once. Start with the basics, such as daily to-do lists or a weekly overview. Once you’re comfortable, gradually add more features like habit tracking, goal-setting, and time-blocking.
- Customize to Fit Your Needs: Make sure your planner is tailored to your life. If you’re a student, focus on academic sections like assignment trackers. If you’re managing a business, include project management tools and financial tracking. Adjust layouts, colors, and sections to match your priorities.
- Consistency is Key: The more you use your digital planner, the more valuable it will become. Make a habit of checking in every morning or evening to update your tasks, goals, and plans.
What if I forget to use my planner?
It’s common to go through phases where you might forget to use your planner. Here’s how to stay on track:
- Set Reminders: Use the reminder feature in your planner app to send notifications at certain times of day, prompting you to check your planner. You can also sync your planner with Google Calendar or iCal to get reminders.
- Create a Routine: Build a planning routine by incorporating it into your morning or evening habits. For example, spend 10 minutes every morning reviewing your day’s tasks, or end each evening by reflecting on what you accomplished and planning for tomorrow.
- Place it in Easy Reach: Keep your planner accessible. If it’s on your tablet, make sure the app is easy to find on your home screen. If you use it across devices, sync it so you can access your planner on your phone, tablet, or computer anytime.
- Simplify Your Setup: If you’re overwhelmed by too many features, scale back to a simpler format that feels more manageable. A straightforward daily checklist can be enough to get you back into the habit.
How can I stay motivated to use my digital planner?
Motivation to plan regularly can ebb and flow, but here are a few strategies to help you stay consistent:
- Track Progress Visually: Use habit trackers or progress bars to visually represent how far you’ve come with certain tasks or goals. Seeing your progress on paper can be highly motivating.
- Personalize Your Planner: Make your planner a fun and engaging place to be. Customize it with colors, fonts, stickers, and photos that make it feel more personal. The more you enjoy being in your planner, the more likely you are to use it.
- Set Achievable Goals: Break larger tasks into smaller, more manageable ones. This makes it easier to check off completed tasks and feel a sense of accomplishment, keeping you motivated to continue.
- Reward Yourself: Set small rewards for sticking to your planning routine. For example, after using your planner consistently for a week, treat yourself to something you enjoy, like a movie night or a new digital sticker pack.
How do I prevent overplanning?
Overplanning – filling your days with too many tasks, can lead to frustration when you don’t accomplish everything. Here’s how to avoid it:
- Set Realistic Expectations: Be honest with yourself about how much time you really have in a day. Instead of cramming every possible task into your planner, choose 3-5 key tasks that are achievable and important.
- Prioritize Tasks: Use tools like the Eisenhower Matrix to separate urgent and important tasks from those that can be postponed or delegated. This way, you’re focusing on what truly matters and aren’t weighed down by less critical tasks.
- Time-Blocking: By allocating specific time slots for each task or category, you’ll avoid overloading your day. If you notice your time blocks are overflowing, it’s a sign you’re trying to do too much.
How do I stay consistent with my digital planner?
Consistency is crucial for effective planning. Here’s how to build a habit of using your digital planner daily:
- Set a Regular Planning Time: Choose a specific time each day to check your planner, such as in the morning before starting work or in the evening when winding down. Make it part of your routine, just like brushing your teeth.
- Use Positive Reinforcement: Reward yourself for staying consistent. This could be as simple as adding a fun sticker when you complete a task or taking a short break after planning your day.
- Track Your Usage: Add a habit tracker to your planner where you log each day you use it. Seeing a streak of consistent usage will motivate you to keep it going.
- Make Adjustments as Needed: If your planning system feels like it’s not working, don’t give up, just tweak it. Try a different layout, reduce the number of sections, or focus on just one area (like daily to-do lists) until you find what fits your style.
What if I need help choosing a digital planner app?
Choosing the right digital planner app depends on your needs, preferences, and device compatibility. Here’s a guide to help you choose:
- GoodNotes: Ideal for those who prefer handwriting their notes. It’s user-friendly and allows for a natural pen-and-paper experience with added digital features like hyperlinks and stickers. Great for iPad users with an Apple Pencil.
- Notability: Similar to GoodNotes but with the added benefit of audio recording. This app is useful for students or professionals who want to record meetings or lectures while taking notes.
- ZoomNotes: For power users who need advanced features like zooming, layers, and a more flexible layout. It’s great for detailed planners who want more control over their page setup.
- Penly: An Android app that offers similar features to GoodNotes.
- PDF Expert: This app is excellent for annotating PDFs and offers a simpler interface than other apps. It’s great if you just want to use a digital planner without too many extra features.
- Key Considerations:
- Device Compatibility: Make sure the app works with your devices. GoodNotes and Notability are only available on iOS, Penly is available on Android, while ZoomNotes is cross-platform.
- Writing vs. Typing: If you prefer handwriting, apps like GoodNotes and Notability are better. If you prefer typing, OneNote or PDF Expert might suit you more.
- Cloud Syncing: Choose an app that syncs easily across all your devices if you need access on the go.
How can I troubleshoot common digital planner issues?
Sometimes, you might run into problems while using your digital planner. Here’s how to troubleshoot common issues:
Syncing Problems:
- Check Your Internet Connection: Syncing issues are often caused by a weak or intermittent internet connection. Make sure you’re connected to Wi-Fi or cellular data.
- Ensure Cloud Services Are Active: Double-check that your app is properly connected to your cloud service (iCloud, Google Drive, Dropbox, etc.). If syncing fails, try logging out and back in or refreshing the connection.
- Update Your App: Make sure you’re using the latest version of your app. Updates often fix bugs and improve functionality, including syncing issues.
Planner Is Slow or Lagging:
- Close Other Apps: Running too many apps at once can slow down your device, which affects your planner’s performance. Close unnecessary apps to free up memory.
- Reduce File Size: Large digital planners with lots of stickers, images, or embedded files can slow down your app. Try reducing the file size by minimizing the number of large images or splitting your planner into smaller sections (e.g., monthly planners instead of an entire year).
Planner Pages Are Missing:
- Restore from Backup: If pages disappear or seem to be missing, check your cloud backup. You can restore the most recent version of your planner from the cloud or from previous backups.
- Check Hyperlinks: Sometimes hyperlinks can break or point to the wrong page. Make sure the links are correctly set up, and if necessary, reset them manually.
How do I troubleshoot if my handwriting doesn’t look natural in the app?
If your handwriting doesn’t look smooth or natural in your digital planner, here are some things to try:
- Adjust Stylus Settings: Many apps allow you to adjust the sensitivity and stroke width of your stylus. Experiment with these settings to find the sweet spot where your handwriting feels most natural.
- Practice Writing: Writing on a screen can feel different from paper. Give yourself some time to adjust, and practice writing in your planner to develop a comfortable rhythm.
- Use a Screen Protector: If you’re using a tablet, consider using a paper-like screen protector. These create a textured surface that mimics the feel of writing on paper, making it easier to control your pen strokes.
- Use Zoom for Precision: If you’re writing in a small space, use the zoom function to enlarge the area. This allows for more precise handwriting and prevents messy strokes.
What’s the best way to manage multiple projects or roles in my planner?
If you’re juggling multiple roles (e.g., parent, employee, entrepreneur) or projects, here’s how to stay organized:
- Create Separate Sections: Dedicate different sections or pages in your planner to each role or project. For example, you might have a section for work tasks, another for personal goals, and a third for household management.
- Color-Code Your Tasks: Use color-coding to differentiate between tasks for different roles or projects. For instance, use blue for work-related tasks, green for personal projects, and orange for family responsibilities. This way, you can easily scan your planner and prioritize accordingly.
- Link to Sub-Planners: If your app supports hyperlinks, you can link your master planner to specific project planners. For example, in your weekly overview, you can link to detailed project breakdowns for each goal or role.
What’s the difference between using a digital planner and a project management app?
Digital planners and project management apps have different strengths, and each works best in different contexts:
Choosing the Right Tool: If you’re working on solo projects or managing your personal life, a digital planner gives you more flexibility and personalization. If you’re managing a team or need more advanced tracking, a project management app might be a better fit. You can also use both – your planner for personal organization and a project app for work collaboration.
Digital Planners: These are best for personal planning, goal-setting, and everyday task management. They allow for customization, handwriting, and creative organization, which makes them ideal for managing individual tasks, habits, and life goals.
Project Management Apps: Tools like Trello, Asana, or ClickUp are designed for team collaboration and complex project tracking. They work well for coordinating with multiple people, assigning tasks, and setting deadlines for group projects. These apps are more structured and less customizable than digital planners but are excellent for managing large-scale projects.
Planners For Specific Purposes
Digital planners aren’t just for everyday tasks and appointments, they can be tailored to help you manage different areas of your life more effectively. Whether you’re a student juggling classes, an entrepreneur managing a business, or someone focused on fitness and wellness, creating a planner that fits your specific needs can greatly enhance your organization and productivity. Here’s how to customize your planner for a variety of specific purposes.
Academic Planners for Students
As a student, keeping track of classes, assignments, exams, and extracurricular activities can be overwhelming. A well-organized academic planner can help you stay on top of deadlines, manage your study time, and maintain a balanced school-life routine.
Course Schedule:
- Create a Course Schedule Page: Dedicate a section in your planner to your course schedule. Include class times, professors’ office hours, and any recurring events like study groups or club meetings.
- Color-code each course so you can easily differentiate between them when planning your week.
Assignment Tracker:
- Track Assignments and Deadlines: Add an assignment tracker to your planner where you can log due dates for papers, projects, and homework. Organize assignments by subject and prioritize based on deadlines.
- Break down large assignments into smaller tasks, such as research, drafting, editing, and final submission. Schedule each step in your planner to avoid last-minute cramming.
Study Planning and Exam Preparation:
- Create a Study Schedule: Use your planner to create a study plan leading up to exams. Time-block study sessions for each subject and focus on high-priority topics.
- Include reminders for review sessions, practice tests, or meeting with study groups.
Track Grades and Academic Goals:
- Monitor Academic Progress: Keep a page where you can track your grades and performance throughout the semester. This allows you to identify areas where you might need extra study time or help from a tutor.
- Set academic goals for each semester (e.g., “Achieve a 3.5 GPA”) and break down how you plan to achieve them in your planner.
Business or Entrepreneurial Planning
For entrepreneurs or business professionals, an effective digital planner can help manage projects, track finances, and set long-term goals. Here’s how to set up a business planner to keep everything on track:
Project Management:
- Create a Project Overview: Dedicate a section of your planner to managing business projects. Break down each project into tasks and milestones, then assign deadlines for each.
- Use Gantt chart-style timelines to visualize project progress and keep all stakeholders on track.
Client and Meeting Management:
- Track Client Interactions: Set up pages to track your client meetings, calls, and follow-up tasks. Include sections for client contact information, project notes, and next steps.
- Schedule client check-ins, deadlines, and progress updates in your daily or weekly planner.
Financial Tracking:
- Create a Business Budget: Use your planner to manage your business finances by tracking income, expenses, and profits. Include a section for monthly or quarterly financial reports.
- Set financial goals (e.g., revenue targets, savings for investments) and track progress toward these goals in your planner.
Marketing & Content Calendar:
- Plan Your Marketing Strategy: If you’re managing marketing campaigns or social media, include a content calendar where you can schedule posts, blog articles, newsletters, and promotional events.
- Use your planner to track the performance of campaigns (e.g., analytics, engagement) and make adjustments as needed.
Fitness & Wellness Planning
Whether you’re working toward fitness goals, focusing on mental health, or building a healthy lifestyle, a fitness and wellness planner can help you stay accountable and monitor progress.
Fitness Goals:
- Set SMART Fitness Goals: Dedicate a section in your planner to specific fitness goals (e.g., “Run 5K in under 30 minutes” or “Work out 5 times a week”). Break these goals down into daily and weekly workouts to track your progress.
- Include Workout Plans: Plan your weekly workouts by creating a detailed schedule of exercises, sets, and reps. You can also log the duration of each workout and monitor improvements over time.
Meal Planning & Nutrition:
- Plan Meals and Track Nutrition: Add a section for meal planning where you can schedule meals for the week and track nutritional goals (e.g., calories, macronutrients).
- If you’re following a specific diet or have fitness-related nutrition goals, use your planner to track your daily intake and make adjustments based on your results.
Wellness Routines:
- Incorporate Wellness Practices: Add a page for wellness routines like meditation, yoga, stretching, or mindfulness practices. Use habit trackers to log how often you engage in these activities.
- Create morning or evening routines that help you maintain balance and mental well-being. Schedule time for relaxation, self-care, and hobbies.
Progress Tracking:
- Log Physical Progress: Keep track of physical measurements, body weight, and other health markers. Add before-and-after photos to visualize your fitness journey.
- Include graphs or visual trackers to monitor changes over time, whether it’s weight loss, muscle gain, or overall fitness improvements.
Finance & Budgeting Planning
A financial planner helps you manage your money, track expenses, and work toward savings goals. Here’s how to set up a financial section in your digital planner to manage personal or business finances effectively.
Monthly Budgeting:
- Create a Monthly Budget Template: Set up a budgeting page where you can track your income, expenses, and savings goals for each month. Break your expenses down into categories like housing, transportation, groceries, entertainment, and savings.
- Use your planner to track actual expenses versus budgeted amounts and adjust your spending if necessary.
Debt Management:
- Track Debt Payments: If you’re working on paying off loans or credit card debt, create a page to monitor your payments. Include columns for total debt, interest rates, monthly payments, and payoff dates.
- Use visual trackers to monitor your progress as you pay off debt. This can be highly motivating and help you stay on track.
Savings Goals:
- Set Short-Term and Long-Term Savings Goals: Use your planner to set financial goals like saving for a vacation, an emergency fund, or retirement. Break down these goals into smaller, achievable monthly contributions.
- Include a savings tracker where you can log contributions each month and watch your progress.
Investment Tracking:
- Monitor Investments: If you have investments (e.g., stocks, bonds, or real estate), dedicate a section to track their performance. Include key metrics like purchase price, current value, and dividends or interest earned.
- Schedule regular reviews of your investments to ensure you’re meeting your financial goals.
Creative Planning (Art, Writing, and Projects)
For creatives – whether you’re an artist, writer, or working on personal projects – a creative planner can help you organize ideas, plan projects, and track progress on your creative endeavors.
Brainstorming & Idea Journaling:
- Create an Idea Journal: Dedicate a section of your planner to brainstorming and capturing ideas. Whether it’s for new art projects, story concepts, or DIY ideas, jot down notes, sketches, or rough outlines whenever inspiration strikes.
- You can even use mind maps, doodles, or visual representations to help you develop your ideas further.
Project Planning:
- Plan Creative Projects: For larger creative projects, like writing a book, painting a series, or launching a podcast, break the project into smaller tasks. Set deadlines for each phase, such as brainstorming, drafting, editing, and finalizing.
- Track project milestones and use visual progress bars to keep yourself motivated and on track.
Creative Routines:
- Build Daily or Weekly Routines: If you’re trying to build a creative habit, such as writing every day or drawing regularly, use your planner to schedule creative time. You can also use habit trackers to log how often you practice your craft.
- Include creative prompts or challenges in your planner to inspire regular practice.
Inspiration and Mood Boards:
- Create Digital Mood Boards: Use your planner as a place to collect inspiration for your projects. Add images, color palettes, quotes, or other elements that inspire you and help you stay focused on your creative goals.
- You can also create a vision board for your creative life, filled with goals, aspirations, and motivational images.
Family & Household Management
Managing a household and family activities requires careful planning and coordination. A family planner can help you stay organized, track chores, manage family schedules, and plan events.
Family Calendar:
- Track Everyone’s Schedules: Set up a family calendar where you can log each family member’s activities, appointments, and events. Use color-coding for each person to easily see who’s busy and when.
- Add school schedules, sports practices, work commitments, and family events to ensure everything runs smoothly.
Chore Charts and Task Lists:
- Assign Family Responsibilities: Use your planner to create chore charts and task lists for each family member. Track household duties like cleaning, yard work, meal prep, and laundry, assigning each task to the appropriate person.
- Add a reward system to encourage kids to complete their chores, and track progress using stickers or visual charts.
Meal Planning & Grocery Lists:
- Plan Family Meals: Use your planner to schedule meals for the week and track grocery lists. Include space for favorite family recipes, and rotate meals to make planning easier.
- Create a grocery list page where you can check off items as you shop. Some apps also allow you to sync this list with others, so everyone in the household can contribute.
Budgeting & Bill Tracking:
- Track Family Finances: If you manage a household budget, dedicate a section to tracking income, expenses, and savings. Include reminders for upcoming bills, subscriptions, and other recurring expenses.
- Track shared family goals, such as saving for a vacation or making a big purchase, to ensure everyone is on board with the financial plan.
Customizing a digital planner for specific purposes can transform it into a powerful tool that helps you manage all areas of your life – from academics and business to family, finances, fitness, and creativity. By tailoring your planner to suit your needs, you’ll be better equipped to stay organized, productive, and motivated in every aspect of your daily routine.
Making Digital Planners Fun & Engaging
While digital planners are designed to keep you organized and productive, they can also be a source of creativity and enjoyment. Customizing your planner to reflect your style and personality can make the planning process more enjoyable, encouraging you to stay consistent. By adding engaging visual elements, playful challenges, and interactive features, you can turn your digital planner into a tool that’s not only practical but also something you look forward to using daily.
Let’s dive into some fun and engaging ways to personalize and enjoy your digital planner.
Personalize and Beautify Your Digital Planner
One of the most exciting aspects of digital planners is the ability to fully customize them to match your personality and preferences. Here are some ideas to make your planner beautiful, creative, and uniquely yours:
Choose a Color Theme:
- Create a Cohesive Color Palette: Select a color theme that reflects your personality or changes with the seasons. Many digital planners allow you to customize font colors, backgrounds, and highlights, so you can easily create a visually appealing layout.
- For example, choose soft pastels for a calming aesthetic, bold primary colors for an energetic vibe, or muted earth tones for a more minimalist look.
Customize Fonts:
- Add Personality with Custom Fonts: Many digital planner apps, such as GoodNotes or Notability, allow you to customize fonts for different sections. Choose playful fonts for casual notes, elegant scripts for personal reflections, or clean, modern fonts for to-do lists.
- Mix and match fonts for headers, body text, and notes to create a layout that feels unique and expressive.
Decorate with Stickers:
- Digital Stickers for Visual Appeal: One of the easiest and most fun ways to make your planner engaging is by using digital stickers. These can range from functional icons like checkmarks or reminders to decorative stickers like doodles, animals, or motivational quotes.
- Use seasonal stickers to mark holidays or special occasions. For example, you can add autumn leaves or pumpkins in the fall, snowflakes in the winter, or flowers in the spring to add a touch of fun.
- Stickers can also be used to visually track habits, such as adding a water bottle sticker each time you meet your hydration goal or a star sticker for completing a task.
Incorporate Images and Inspiration:
- Add Photos for a Personal Touch: Incorporate personal photos or inspirational images into your planner. You can add photos of family, pets, or travel destinations to your daily or weekly pages, making your planner more meaningful and enjoyable to look at.
- Use images from your favorite hobbies, dream goals, or travel bucket list to inspire you as you plan.
Create Beautiful Backgrounds:
- Customize Your Planner’s Backgrounds: Some digital planners allow you to change or upload your own background images. Select backgrounds that inspire you, whether it’s a serene landscape, a motivational quote, or a custom design you create yourself.
- You can even change your planner’s background to reflect the time of year or your mood. For example, use a cozy winter scene for December or a vibrant beach image for summer.
Using Digital Stickers and Inserts
Digital stickers and inserts are a great way to add a creative flair to your planner while also enhancing its functionality. Here’s how to make the most of these features:
Where to Find Digital Stickers:
- Download Sticker Packs: There are many free and paid digital sticker packs available online, including themed stickers for different holidays, events, or planner types (e.g., fitness, finance, productivity). Websites like Etsy, Pinterest, or creative platforms like Canva are great places to find high-quality stickers.
- You can also find stickers specifically designed for certain apps, such as GoodNotes, Notability, etc.
Create Your Own Stickers:
- Design Custom Stickers: If you enjoy drawing or designing, you can create your own digital stickers using tools like Procreate, Canva, or Photoshop. This allows you to tailor your stickers to your exact preferences, whether it’s for tracking habits, decorating your planner, or adding custom labels.
- If you’re using a tablet, you can hand-draw your own stickers directly in apps like GoodNotes or ZoomNotes for a more personal touch.
Use Functional Stickers:
- Functional Stickers for Organization: Use functional stickers like checkboxes, flags, arrows, and icons to organize your planner and make it more interactive.
- For example, add checkmark stickers to track task completion, progress bars to visualize goal progress, or icons to mark important events like birthdays, deadlines, or appointments.
Decorative Stickers for Fun:
- Make Planning Fun with Decorative Stickers: Add decorative stickers to make your planner pages more engaging and colorful. Use seasonal stickers, motivational quotes, or playful icons to add personality to your planning process.
- For example, add a heart sticker for self-care days, flowers to mark the start of spring, or stars to represent goals achieved. These little touches can make your planner more enjoyable to use.
Create Your Own Digital Stickers and Inserts
Designing your own stickers and inserts can take your customization to the next level. Here’s how to create them:
Using Canva for Custom Stickers:
- Canva is an easy-to-use design tool that allows you to create your own digital stickers from scratch.
- Start by choosing the sticker size and shape you want. Use Canva’s templates or start with a blank canvas. Add icons, text, shapes, and images to create your custom stickers.
- Download your stickers as PNGs with a transparent background, and import them into your digital planner to add a personal touch.
Hand-Draw Stickers in Procreate or GoodNotes:
- Procreate is a popular drawing app for iPad that allows you to create high-quality, hand-drawn stickers. You can use different brushes, textures, and colors to create one-of-a-kind stickers for your planner.
- If you prefer simplicity, you can also hand-draw stickers directly in your planner app (like GoodNotes). Use the app’s drawing tools to sketch doodles, symbols, or lettering, and save them as reusable stickers.
Inserts for Extra Organization:
- Design Custom Inserts: Inserts are additional pages or sections that you can add to your digital planner to track specific items (e.g., meal planning, budgeting, fitness goals).
- Create inserts for meal planners, grocery lists, or budget trackers using apps like Canva or Photoshop. These can be saved as PDFs and added to your digital planner for easy use.
Gamify Your Planning Experience
Turning planning into a game can make it more engaging and fun, motivating you to stick with your routine and achieve your goals. Here’s how to introduce gamification into your planner:
Create Reward Systems:
- Earn Rewards for Completing Tasks: Set up a reward system where you can “earn” points for completing tasks, habits, or goals. For example, give yourself a certain number of points for each task completed on time or for sticking to a habit for a week.
- When you hit a milestone (e.g., 50 points), reward yourself with something enjoyable, like a favorite snack, movie night, or even purchasing new planner stickers.
Track Habits with Visual Progress Bars:
- Progress Bars for Habits and Goals: Create visual progress bars in your planner to track habits, long-term projects, or milestones. Each time you make progress, color in a section of the bar to show how far you’ve come.
- This not only motivates you to keep going but also provides a clear visual representation of your achievements.
Use Achievement Stickers:
- Celebrate Wins with Achievement Stickers: Add a sense of accomplishment to your planner by using “achievement” stickers when you complete goals or major tasks. These could include gold stars, trophies, or “You Did It!” banners.
- You can even create themed achievements for specific areas, like fitness goals, work milestones, or self-care habits.
Challenge Yourself with Weekly or Monthly Goals:
- Planning Challenges: Set up weekly or monthly challenges in your planner to gamify your goals. For example, you could create a “30-day workout challenge,” a “meal prep challenge,” or a “reading challenge.”
- Each time you complete a challenge, reward yourself with stickers, points, or a celebratory note. These challenges can keep you engaged and focused on your goals.
Incorporating Vision Boards and Inspirational Quotes
A digital planner is a great place to visualize your dreams and goals. Incorporating a vision board or adding motivational quotes can inspire and uplift you as you plan.
Create a Digital Vision Board:
- Add a Vision Board to Your Planner: Create a page in your planner dedicated to a digital vision board. Use images, quotes, and graphics that represent your dreams and goals, whether they’re related to career, travel, fitness, or personal growth.
- Update your vision board regularly to reflect new aspirations or achievements. It can be a powerful reminder of what you’re working toward and help keep you motivated.
Include Motivational Quotes:
- Sprinkle Quotes Throughout Your Planner: Adding motivational quotes to your planner can boost your spirits and give you that extra push when you need it.
- You can add quotes at the beginning of each week, include a daily affirmation, or place them near your habit trackers to keep you inspired.
- Customize the font and colors of your quotes to match your planner’s aesthetic or change them seasonally to reflect new intentions.
Creative Journaling with Your Digital Planner
If you enjoy journaling or creative writing, you can use your digital planner as a space for creative expression. Here’s how to integrate journaling into your daily planning routine:
Daily Gratitude Journaling:
- Create a Gratitude Journal Section: Dedicate a section of your planner to daily or weekly gratitude journaling. Write down 3-5 things you’re grateful for each day, and decorate the page with doodles, stickers, or images.
- This practice can improve your mood and help you reflect on the positive aspects of your life.
Freewriting and Doodling:
- Incorporate Freewriting Pages: Use blank or dot-grid pages in your digital planner for freewriting sessions. These pages are perfect for jotting down thoughts, reflections, or creative ideas. Doodle or sketch alongside your writing to make the process more engaging.
- Freewriting is a great way to clear your mind, brainstorm new ideas, or work through challenges in a relaxed, creative way.
Art Journaling:
- Express Yourself with Art: Use your planner’s drawing tools or import images to create an art journal section. You can sketch, paint digitally, or add collage elements to represent your emotions, experiences, or goals visually.
- Incorporate mood tracking with colors or drawings to express how you’re feeling each day or week.
By making your digital planner fun and engaging, you’re more likely to stick with it and enjoy the process of planning, tracking, and achieving your goals. Whether it’s through customization, digital stickers, gamification, or creative journaling, there are endless ways to make your planner reflect your personality and style, turning planning into a joyful and motivating daily habit.
Using Digital Planners for Personal Growth
Personal growth is a lifelong journey that involves setting meaningful goals, tracking progress, and continually reflecting on your experiences and development. A digital planner is an invaluable tool in this process, helping you stay organized and intentional about your self-improvement efforts. Whether you want to cultivate positive habits, pursue professional development, or nurture emotional well-being, your digital planner can serve as both a guide and a record of your progress.
In this section, we’ll explore how to effectively use your digital planner to support your personal growth journey, from setting goals to tracking habits and reflecting on progress.
Why Use a Digital Planner for Personal Growth?
Using a digital planner for personal growth allows you to organize your self-improvement efforts in one place, making it easier to stay consistent and measure your progress over time. Here’s why digital planners are particularly suited for personal development:
Centralized Organization:
- Keep Everything in One Place: Digital planners allow you to centralize all aspects of your personal growth – goals, reflections, habits, and milestones – in one accessible platform. This makes it easier to track your progress and adjust your plans as you grow.
- Example: Instead of juggling multiple journals, apps, and notebooks, your digital planner serves as an all-in-one tool for organizing different areas of your life – career, fitness, emotional well-being, and more.
Customizable for Your Needs:
- Adapt Your Planner to Fit Your Goals: Digital planners are highly customizable, allowing you to design your planner around your unique personal growth journey. You can create pages for specific goals, track habits, or add templates for journaling and reflection.
- Tip: Customize your planner’s layout based on your focus areas, whether it’s self-care, career growth, fitness, or relationships.
Track Long-Term Progress:
- Monitor Your Growth Over Time: One of the key benefits of using a digital planner for personal growth is the ability to track long-term progress. You can easily look back at previous weeks, months, or even years to see how far you’ve come.
- Tip: Use your planner to log milestones and set reminders to review your progress regularly.
Visualize Your Goals and Achievements:
- Create Visual Progress Trackers: Many digital planners offer visual tools like progress bars, graphs, and habit trackers that can help you see your growth in real-time. These visual cues keep you motivated and make it easy to identify areas where you’re excelling or need to focus more attention.
- Example: Create a visual tracker for your goals, whether it’s learning a new skill, completing a course, or improving your fitness routine.
Setting Meaningful Goals
Setting clear, meaningful goals is the foundation of personal growth. Your digital planner is the perfect place to document your short-term and long-term goals, break them down into actionable steps, and track your progress over time.
SMART Goals Framework:
- Set SMART Goals: The SMART framework (Specific, Measurable, Achievable, Relevant, and Time-bound) is a popular method for setting clear and achievable goals. Use your planner to structure your goals using this framework.
- Example: Instead of setting a vague goal like “improve fitness,” you could set a SMART goal like “Run 5 miles twice a week for the next 3 months to increase endurance.”
- Break down the goal into smaller, manageable tasks, such as creating a weekly running schedule and tracking your progress using a fitness log in your planner.
Create a Goal-Setting Page:
- Dedicated Goal Pages: Create specific pages in your planner for each goal you want to achieve. On each page, outline the details of the goal, the steps needed to achieve it, deadlines, and potential obstacles.
- Tip: Use templates or trackers to add structure to your goal-setting pages, including space for progress updates, action steps, and motivational quotes.
Break Goals into Milestones:
- Divide Goals into Milestones: For larger or long-term goals, break them down into smaller milestones that are easier to track and achieve. Use your planner to set deadlines for each milestone and celebrate small victories along the way.
- Example: If your goal is to write a book, break it down into milestones such as completing the outline, writing the first draft, and editing each chapter. Track these milestones in your planner to maintain focus and momentum.
Tracking Habits for Personal Growth
Habits are the building blocks of personal growth. Developing positive habits and eliminating unproductive ones can dramatically improve various aspects of your life. A digital planner makes it easy to track your habits and stay consistent in your efforts.
Use Habit Trackers:
- Visual Habit Tracking: Add a habit tracker to your planner, where you can log daily habits such as exercising, meditating, drinking water, or reading. These trackers provide a visual representation of your consistency, helping you stay motivated as you build new habits.
- Tip: Use color-coded trackers to represent different habits (e.g., green for health habits, blue for productivity, red for self-care), making it easy to see how well you’re balancing different areas of your life.
Focus on One Habit at a Time:
- Start Small: If you’re working on personal growth, it’s often best to focus on one habit at a time. Use your planner to prioritize which habits you want to develop first and track your progress before adding new habits.
- Example: If you’re focusing on building a fitness routine, track your workouts for 30 days. Once you’ve established that habit, add another, such as practicing daily gratitude or improving your sleep routine.
Set Reminders for Daily Habits:
- Schedule Daily Habits: Use your planner to set reminders for daily habits, whether it’s a morning meditation, stretching, or journaling session. Consistency is key to developing habits, and your planner can help you stay on track by scheduling these activities.
- Tip: Link your digital planner with calendar apps or reminder apps to set automatic alerts for your daily habits.
Review and Adjust:
- Reflect on Habit Progress: At the end of each week or month, use your planner to reflect on your habit-tracking progress. Review which habits you’ve maintained consistently and which ones need improvement. Adjust your strategies as needed.
- Tip: Use reflection pages in your planner to note how your habits are impacting your overall well-being and personal growth.
Using Journaling for Self-Reflection and Mindfulness
Journaling is a powerful tool for personal growth, helping you process emotions, reflect on experiences, and gain clarity on your goals. Your digital planner can serve as a space for regular journaling, allowing you to document your thoughts, track your emotions, and engage in self-reflection.
Daily Reflection Pages:
- Set Aside Time for Daily Reflection: Create a section in your planner for daily or weekly journaling, where you reflect on your day, note any challenges or wins, and explore your thoughts and emotions. Journaling regularly helps you stay connected with your personal growth journey.
- Tip: Use prompts to guide your journaling, such as “What did I learn today?” or “What am I grateful for this week?”
Track Your Emotional Well-Being:
- Use Mood Trackers: Include a mood tracker in your planner to monitor your emotional state over time. This can help you identify patterns in your moods and the factors that influence them, allowing you to make adjustments to improve your well-being.
- Example: Track your mood daily, using a color-coded system (e.g., blue for calm, yellow for happy, red for stressed). Review your mood tracker at the end of the month to gain insights into your emotional health.
Mindfulness and Gratitude Journaling:
- Practice Mindfulness: Use your digital planner to engage in mindfulness exercises, such as listing three things you’re grateful for each day or noting positive affirmations. These practices help you stay grounded and focused on the present moment, contributing to emotional growth.
- Tip: Dedicate a section of your planner to gratitude journaling, where you record what you’re thankful for and reflect on how these moments contribute to your personal happiness.
Tracking and Reflecting on Progress
Regularly reviewing your progress is essential for personal growth. Your digital planner can help you track milestones, reflect on your achievements, and identify areas for improvement.
Use Progress Trackers:
- Visualize Your Growth: Create progress trackers in your planner to visualize your achievements over time. This could include personal goals, professional milestones, fitness progress, or financial savings. Tracking progress keeps you motivated and allows you to see tangible results.
- Example: Use a progress bar or pie chart to track a specific goal, like reading 20 books in a year or saving for a major purchase. Update the tracker as you reach each milestone.
Monthly Reflections:
- Set Up Monthly Reflection Pages: At the end of each month, use your planner to reflect on your personal growth. Ask yourself questions like, “What did I accomplish this month?” “What challenges did I face?” and “What can I improve next month?”
- Tip: Use a structured reflection template in your planner to guide this process. You can include sections for highlights, lessons learned, and areas to focus on in the coming month.
Celebrate Achievements:
- Celebrate Wins, Big or Small: Personal growth is a long-term process, so it’s important to celebrate your wins, both big and small. Use your planner to acknowledge achievements, whether it’s completing a major project or maintaining a new habit for a month.
- Tip: Create a “Celebration Page” where you note accomplishments and reflect on the positive changes you’ve made in your life.
Incorporating Self-Care into Your Planner
Personal growth isn’t just about productivity and achieving goals, it also involves taking care of your mental and emotional well-being. Your digital planner can help you prioritize self-care and ensure you’re making time for activities that nurture your body, mind, and soul.
Schedule Self-Care Activities:
- Dedicate Time for Self-Care: Use your planner to schedule regular self-care activities, such as reading, meditation, exercise, or creative hobbies. This helps you prioritize your well-being and ensures you’re making time for rest and relaxation.
- Example: Schedule “me time” in your planner each week, whether it’s a long bath, a walk in nature, or a yoga session.
Create a Self-Care Checklist:
- Track Self-Care Routines: Include a self-care checklist in your planner where you track activities that help you feel balanced and rejuvenated. This might include getting enough sleep, drinking water, practicing mindfulness, or connecting with loved ones.
- Tip: Use a habit tracker to monitor your self-care routines and ensure you’re maintaining a healthy balance between work and rest.
Reflect on Emotional Well-Being:
- Use Emotional Check-Ins: Schedule regular emotional check-ins in your planner to reflect on how you’re feeling and what you need to improve your mental health. This could involve journaling about your emotions, assessing stress levels, or engaging in mindfulness practices.
- Tip: Use mood trackers or wellness prompts in your planner to guide these emotional check-ins.
Using Your Planner to Build Confidence and Self-Esteem
Confidence and self-esteem are key components of personal growth. Your digital planner can help you cultivate a positive self-image and build the confidence to pursue your goals.
Track Achievements:
- Keep a Record of Wins: Use your planner to track your accomplishments, whether they’re related to work, personal life, or hobbies. By regularly reviewing your achievements, you can boost your confidence and remind yourself of your strengths.
- Tip: Create an “Achievement Log” in your planner where you write down everything from small wins to major milestones. This serves as a reminder of your capabilities when you need a confidence boost.
Set Positive Affirmations:
- Incorporate Affirmations into Your Planner: Add daily or weekly affirmations to your planner to help reinforce a positive mindset. These affirmations can be related to your self-worth, abilities, or the goals you’re working toward.
- Example: Write down affirmations like “I am capable of achieving my goals” or “I am worthy of success” in your planner’s reflection section or on your daily pages.
Reflect on Growth and Progress:
- Focus on Growth, Not Perfection: Use your planner to remind yourself that personal growth is about progress, not perfection. Regularly reflect on how far you’ve come and celebrate the small steps you’ve taken, even if the overall journey is still ongoing.
- Tip: Include a “Growth Journal” in your planner where you write about moments of personal growth, challenges you’ve overcome, and lessons learned along the way.
By using a digital planner as a tool for personal growth, you can stay organized, track your progress, and build the habits and mindset needed to achieve your goals. Whether you’re focusing on self-care, developing new skills, or building confidence, your planner will serve as both a guide and a record of your journey toward becoming the best version of yourself.
Seasonal Planning Tips
Each season brings its own unique challenges and opportunities, from summer vacations and winter holidays to spring cleaning and fall goal-setting. By adapting your digital planner to reflect the seasons, you can stay ahead of important dates, plan seasonal activities, and align your goals with the rhythm of the year. Seasonal planning ensures you’re prepared for the months ahead and helps you make the most of each time of year, whether it’s setting new goals, preparing for holidays, or adjusting your routine based on the weather.
Let’s explore how to customize your digital planner for each season and take advantage of seasonal shifts in your personal and professional life.
Why Seasonal Planning Is Important
Seasonal planning helps you stay organized by aligning your schedule with the changing demands of each time of year. Here’s why it’s beneficial to plan seasonally:
Adapting to Seasonal Changes:
- Prepare for Weather Changes: Different seasons often come with changes in the weather, which can affect your daily routine, travel plans, and even mood. Seasonal planning helps you prepare for these changes by adjusting your schedule and activities accordingly.
- Example: In winter, you may need to plan for shorter days and colder weather, while in summer, you might focus on outdoor activities and vacations.
Stay on Top of Seasonal Events:
- Plan for Holidays and Celebrations: Each season brings its own set of holidays, events, and celebrations. By adjusting your planner seasonally, you can prepare for major holidays (like Christmas, Halloween, or summer vacations) and make sure you’re ready for gift-giving, travel, and family gatherings.
Set New Goals Based on the Season:
- Seasonal Goal Setting: Many people find that their priorities shift with the seasons. For example, spring might be a time for renewal and fresh starts, while fall is often associated with reflection and setting goals for the coming year. Seasonal planning allows you to align your goals with the natural rhythm of the year.
Keep Your Planner Fresh and Motivating:
- Refresh Your Planner Design: Adjusting your planner’s design, layout, and color scheme to match the season can keep you motivated and engaged. Seasonal themes, stickers, and layouts bring a sense of renewal to your planning routine and can inspire you to stay organized.
Winter Planning Tips
Winter is often associated with holidays, colder weather, and slower-paced routines. Winter planning can help you prepare for holiday gatherings, manage end-of-year tasks, and set goals for the year ahead.
Plan for the Holidays:
- Create a Holiday Prep Section: Winter is full of holidays like Christmas, Hanukkah, and New Year’s Eve, which often require extra planning. Use your digital planner to create sections for gift lists, travel itineraries, holiday meal planning, and budget tracking.
- Example: Add a holiday shopping checklist with deadlines for buying and sending gifts, organizing family gatherings, and preparing holiday cards.
Set Year-End Goals and Reflections:
- Reflect on the Past Year: Winter is a great time to look back on your achievements and challenges from the past year. Dedicate a page in your planner to reflect on what went well, what you learned, and what goals you didn’t achieve.
- Tip: Use a year-end review template to analyze your progress and set new goals for the coming year.
Prepare for Winter Weather:
- Adjust Your Routine: Colder weather and shorter days can impact your energy levels and productivity. Use your planner to schedule indoor activities, self-care routines, and cozy downtime.
- Example: Create a “Winter Wellness” section where you plan for activities like hot drinks, reading by the fire, or winter walks to stay active and relaxed.
Set New Year’s Resolutions:
- Start Fresh in the New Year: Use your planner to set meaningful goals for the New Year. Break down resolutions into manageable tasks and schedule regular check-ins to track your progress.
- Tip: Use goal-setting templates to plan out your resolutions, such as fitness goals, career aspirations, or personal development.
Spring Planning Tips
Spring is a time for renewal, growth, and fresh starts. It’s the perfect season to declutter, organize your life, and set new goals for the months ahead.
Spring Cleaning and Decluttering:
- Create a Spring Cleaning Checklist: Spring is synonymous with cleaning and organization. Use your digital planner to create a detailed spring cleaning checklist, breaking down tasks by room or category (e.g., decluttering the kitchen, organizing the garage, deep cleaning the living room).
- Tip: Use a color-coded cleaning schedule to organize your tasks over several weeks and avoid feeling overwhelmed.
Set Fresh Goals for the Season:
- Spring Goal-Setting: Spring represents growth and new beginnings, making it a great time to set fresh goals. These might include starting a new project, improving your fitness routine, or developing a new habit.
- Example: Create a “Spring Goals” section in your planner where you list personal, professional, and wellness goals you want to focus on during the season.
Prepare for Outdoor Activities:
- Plan for Outdoor Adventures: As the weather warms up, spring is the perfect time to enjoy outdoor activities like hiking, gardening, or picnics. Use your planner to schedule weekend getaways, outdoor fitness sessions, or time in nature.
- Tip: Add a gardening tracker to your planner if you’re planning to plant flowers or grow vegetables, tracking when to water, plant, and harvest.
Seasonal Self-Care:
- Focus on Renewal and Well-being: Spring is also a time for self-care and mental renewal. Use your planner to schedule activities that nurture your well-being, such as meditation, spa days, or creative hobbies like painting or journaling.
- Tip: Create a “Spring Self-Care” section with a checklist of calming activities or a gratitude log to boost your mood.
Summer Planning Tips
Summer is often associated with relaxation, vacations, and time spent outdoors. Summer planning can help you make the most of this more laid-back season, whether it’s organizing trips, planning fun activities, or setting goals for the second half of the year.
Plan Summer Vacations:
- Create a Vacation Planner: Summer is prime time for vacations and getaways. Use your digital planner to organize your travel plans, including itineraries, packing lists, and accommodation details. Track expenses and create a budget for each trip.
- Tip: Add a travel journal section to your planner where you can document highlights from your trips, including photos, experiences, and memories.
Schedule Outdoor Activities:
- Enjoy Outdoor Adventures: Summer is perfect for outdoor activities like beach trips, barbecues, camping, or hiking. Use your planner to schedule fun weekend adventures or create a summer bucket list with activities you want to experience.
- Example: Create a “Summer Bucket List” page where you add activities such as swimming, attending local festivals, stargazing, or having a picnic in the park.
Stay Organized During the Heat:
- Beat the Summer Slump: While summer is a great time to relax, it’s also easy to fall behind on productivity. Use your planner to schedule work and personal tasks in the morning when it’s cooler, leaving afternoons for relaxation or indoor activities.
- Tip: Use time-blocking techniques to schedule short bursts of productivity in the morning, followed by breaks for outdoor fun or cooling off.
Mid-Year Goal Review:
- Reflect on Your Year So Far: Summer marks the halfway point of the year, making it a great time for a mid-year review. Reflect on your progress toward your goals, reassess priorities, and make adjustments for the second half of the year.
- Tip: Create a “Mid-Year Review” section in your planner to analyze what you’ve achieved so far and what changes you need to make to stay on track.
Fall Planning Tips
Fall is often associated with a return to routine after the summer months. It’s a time to get back to work, focus on productivity, and prepare for the holiday season. Fall planning can help you organize your schedule, set goals, and make the most of this transitional season.
Back-to-School and Work Planning:
- Prepare for a Productive Fall: Fall is often a time of new beginnings, whether it’s heading back to school or diving into work projects. Use your planner to organize your academic or work tasks, schedule meetings, and set goals for the final quarter of the year.
- Tip: Create a “Fall Projects” section where you track key work or school projects, breaking them down into manageable tasks.
Seasonal Goal Setting:
- Focus on Personal Development: Fall is a great time to focus on self-improvement and personal development. Set new goals for the season, whether they’re related to fitness, career, or personal growth. Use your planner to break these goals down into actionable steps.
- Example: Create a habit tracker in your planner to build consistency with new habits like reading daily, exercising, or meal prepping.
Holiday Preparation:
- Plan for Fall Holidays: Fall brings holidays like Halloween and Thanksgiving, which often require preparation. Use your planner to organize holiday parties, meals, and family gatherings. Create sections for recipes, guest lists, and gift ideas.
- Tip: Add a “Holiday Budget” page to your planner where you track expenses for decorations, food, and gifts, helping you stay within your budget.
Cozy Up Your Routine:
- Embrace Fall’s Cozy Vibes: As the weather cools down, use your planner to schedule cozy indoor activities like reading, baking, or movie nights. Add seasonal self-care activities to your routine, such as warm baths, meditation, or journaling.
- Example: Create a “Fall Favorites” page in your planner where you list seasonal activities like apple picking, baking pumpkin treats, or taking a scenic drive to see fall foliage.
Customizing Your Planner for Each Season
One of the most fun aspects of seasonal planning is customizing your digital planner to reflect the current season. Updating your planner with seasonal themes, colors, and layouts keeps it fresh and motivating. Here’s how you can customize your planner for each time of year:
Seasonal Themes and Stickers:
- Use Seasonal Stickers: Add a touch of seasonal flair to your planner with digital stickers that match the season. For example, use snowflakes and holiday decorations in winter, flowers and pastel colors in spring, sunshine and beach icons in summer, and pumpkins and autumn leaves in fall.
- Tip: Many digital planner apps allow you to import seasonal sticker packs, giving you endless options to decorate your planner based on the time of year.
Change Color Schemes:
- Match Your Planner to the Season: Update your planner’s color scheme to reflect the season’s mood. Use cool blues and whites for winter, soft greens and pinks for spring, bright yellows and oranges for summer, and warm browns and reds for fall.
- Tip: If you use a digital planner app like GoodNotes or Notability, experiment with different highlighter and font colors to create a cohesive seasonal theme.
Create Seasonal Layouts:
- Design Themed Layouts: Get creative with your planner’s layouts by incorporating seasonal elements. For example, use a winter layout with snowy backgrounds and cozy quotes in December or a fresh, floral design for April.
- Tip: If you enjoy using templates, look for seasonal layouts that are already designed for the season. You can find free or paid seasonal templates online that are easy to import into your digital planner.
Reflecting on Each Season
As each season comes to an end, take time to reflect on what you accomplished, learned, and enjoyed. Seasonal reflection helps you assess your progress, appreciate the moments that stood out, and prepare for the upcoming season.
End-of-Season Reflections:
- Create a Reflection Page: Dedicate a page in your planner for seasonal reflections. Write about your accomplishments, challenges, and memorable experiences. This helps you wrap up the season with a sense of closure and prepares you for the next one.
- Example: In your fall reflection, you might write about what you achieved in work or school, highlight your favorite Halloween memories, and set intentions for the winter ahead.
Evaluate Your Goals:
- Check Your Progress: Use your planner’s goal-setting tools to review how far you’ve come on your goals. Evaluate what worked, what didn’t, and what adjustments you need to make for the next season.
- Tip: Create a “Seasonal Wins” section where you celebrate small and big victories, helping you stay motivated as you move forward.
By planning seasonally, you can align your personal and professional life with the natural rhythm of the year. Seasonal planning keeps your digital planner fresh, helps you set relevant goals, and ensures that you’re prepared for the unique demands and opportunities of each season.
Planner Challenges and Accountability
Using a digital planner can help you stay organized, but staying consistent and motivated over time can be challenging. That’s where planner challenges and accountability systems come into play. By participating in challenges and setting up accountability structures, you can push yourself to stay on track, achieve goals, and even experiment with new techniques to enhance your productivity. Challenges offer a fun, structured way to get more out of your planner, while accountability provides external support to help you stay committed.
Let’s explore how planner challenges and accountability can transform your digital planning routine into a powerful tool for personal growth and productivity.
What Are Planner Challenges?
Planner challenges are structured activities where participants follow specific prompts, themes, or tasks over a set period – typically a week, month, or even longer. These challenges often focus on improving productivity, creativity, organization, or achieving specific goals through intentional planning. Challenges can vary in complexity and scope, making them suitable for beginners and advanced planners alike.
Types of Planner Challenges:
- Daily Challenges: These challenges prompt you to complete a small task or entry in your planner each day. Daily challenges often include habit tracking, goal setting, or creative exercises that help you build consistency over time.
- Example: A 30-day habit-tracking challenge where you commit to tracking and completing one new habit each day, such as exercising, drinking water, or practicing mindfulness.
- Monthly Challenges: These challenges typically have a broader focus and encourage participants to reflect on longer-term goals. Monthly challenges may include a combination of goal setting, reflection, and creativity.
- Example: A monthly productivity challenge where you set a major goal at the start of the month and break it down into weekly tasks, tracking your progress and reflecting on your achievements at the end.
- Creative Challenges: For those who enjoy adding a touch of creativity to their digital planner, creative challenges encourage participants to design themed layouts, experiment with digital stickers, or create vision boards.
- Example: A creative layout challenge where each week has a different theme, such as minimalism, color-coding, or seasonal designs, and participants share their designs with the community.
- Goal-Oriented Challenges: These challenges are specifically designed to help you achieve a certain personal or professional goal, such as improving time management, completing a major project, or developing a new habit.
- Example: A 12-week goal-setting challenge where you identify a significant life goal (e.g., launching a business, getting in shape) and break it down into achievable milestones.
Why Participate in Planner Challenges?:
- Build Consistency: Planner challenges help you develop consistency in your planning routine. By following daily or weekly prompts, you’ll get into the habit of using your planner regularly, which can lead to better organization and time management.
- Improve Skills: Challenges push you to try new things, whether it’s experimenting with new planner layouts, learning advanced features of your planner app, or testing different productivity techniques. This helps you grow as a planner and improve your skills over time.
- Stay Motivated: Having specific tasks to complete during a challenge can boost motivation. You’ll feel a sense of accomplishment as you check off tasks and track your progress throughout the challenge period.
- Connect with Others: Many planner challenges are community-based, meaning you’ll be participating alongside others who share similar goals. This sense of camaraderie helps you stay accountable and can inspire you to keep going when you feel stuck.
Popular Planner Challenges to Try
If you’re ready to dive into a planner challenge, here are some popular ones you can try. These challenges focus on different aspects of planning, from productivity and goal-setting to creativity and personal growth.
30-Day Habit Tracking Challenge:
- Focus: Build new habits and routines.
- How It Works: Choose one or more habits you’d like to develop (e.g., reading, exercising, journaling) and track them daily in your planner for 30 days. Use habit trackers to monitor progress, and reflect on how these habits improve your daily life.
- Tip: Use digital stickers or icons to mark each day you complete your habit, adding a fun and visual element to your progress.
Monthly Goal-Setting Challenge:
- Focus: Set and achieve meaningful goals.
- How It Works: At the beginning of the month, choose a major goal and break it down into smaller weekly tasks. Each week, plan out specific actions that will help you achieve the goal. At the end of the month, reflect on your progress and adjust your approach if necessary.
- Tip: Use your planner’s goal-setting tools, like progress bars or milestone trackers, to visually track your achievements throughout the month.
Creative Layout Challenge:
- Focus: Boost creativity in your planner designs.
- How It Works: Each week, create a new planner layout based on a specific theme or prompt. For example, one week might focus on a minimalist design, while the next encourages colorful and playful layouts. Share your layouts with the community for feedback and inspiration.
- Tip: Use templates, digital stickers, and custom fonts to personalize your layouts and experiment with different aesthetics.
Productivity Sprint Challenge:
- Focus: Improve focus and time management.
- How It Works: For a set period (e.g., one week or one month), focus on increasing your productivity using time-blocking, task batching, and focus sessions. Track your productivity each day, reflecting on how your planning techniques help you stay focused and efficient.
- Tip: Use your digital planner to schedule focus sessions (e.g., Pomodoro technique) and track how much time you spend on different tasks.
Accountability: Staying on Track with Your Planner
Accountability plays a crucial role in staying consistent with your planner. Having someone or a group to hold you accountable ensures that you stick to your planning routine, follow through on tasks, and stay motivated, especially when working toward long-term goals.
Why Accountability Matters:
- Increases Motivation: Knowing that someone else is keeping track of your progress can motivate you to stay on top of your plans. Whether it’s a friend, colleague, or community group, having accountability partners helps prevent procrastination.
- Provides Support and Encouragement: Accountability partners or groups offer support when you face challenges. They can give advice, provide encouragement, or help you troubleshoot any obstacles you encounter.
- Enhances Focus and Consistency: When you commit to sharing your progress with others, you’re more likely to stay focused and consistent in your planning routine. This consistency is key to building habits and achieving long-term goals.
How to Set Up an Accountability System
There are various ways to create accountability systems, from one-on-one partnerships to larger group settings. Here’s how you can set up an accountability system that works for you:
Accountability Partner:
- Find a Planning Buddy: An accountability partner is someone who shares similar goals or planning interests. You can check in with each other regularly to share progress, discuss challenges, and offer support.
- Tip: Choose someone whose schedule or planning style aligns with yours, making it easier to stay connected and motivated.
- Set Regular Check-Ins: Schedule weekly or bi-weekly check-ins where you share your progress, discuss any challenges, and review upcoming tasks. These meetings can be done via phone, video chat, or messaging apps.
- Example: If both of you are working on fitness goals, share your workout logs each week and discuss what’s working and where improvements can be made.
Accountability Group:
- Join or Create a Group: If you prefer working in a group, consider joining or creating a planner accountability group. Many digital planner communities offer goal-setting groups, monthly check-ins, or themed challenges where participants share their progress and hold each other accountable.
- Example: A group might focus on personal development, with members sharing their weekly reflections, accomplishments, and goals for the coming week.
- Host Group Challenges: Organize group challenges, where participants set individual goals and share their progress. These challenges can last anywhere from a week to several months, depending on the group’s objectives.
- Tip: Consider starting a weekly accountability thread on a planner forum or within a Facebook group where members post their goals and updates.
Accountability Apps:
- Use Digital Tools for Accountability: There are several apps and tools designed to help you stay accountable. Apps like Habitica (which gamifies habit tracking and accountability), StickK (where you commit to goals with real-world stakes), or Focusmate (where you work alongside accountability partners during focused sessions) can help keep you on track.
- Tip: Integrate these apps with your digital planner by syncing task reminders, setting deadlines, or tracking progress.
Incorporating Planner Challenges and Accountability into Your Routine
To get the most out of planner challenges and accountability systems, it’s important to integrate them into your daily or weekly routine. Here’s how:
Schedule Your Challenges:
- Plan Challenge Days in Advance: If you’re participating in a challenge, block off specific times in your planner to complete each prompt. For example, set aside 15 minutes each day for habit tracking or creative layout design.
- Tip: Use digital stickers or reminders to celebrate each day you complete a challenge task, adding a fun and motivational element to the process.
Create Accountability Checkpoints:
- Set Weekly or Monthly Checkpoints: Whether you’re working with an accountability partner or group, create regular checkpoints in your planner where you’ll review your progress. This could be at the end of each week or month, depending on the duration of your goals.
- Tip: Add reflections to your checkpoints, noting what went well, what could be improved, and how you’ll adjust your planning going forward.
Track Your Progress Visually:
- Use Progress Trackers: Incorporate progress bars, habit trackers, or goal charts into your digital planner to visually track your achievements. These visual cues help you stay motivated as you see your progress build over time.
- Tip: Color-code your progress trackers or add custom icons to make the process more interactive and engaging.
Benefits of Combining Challenges with Accountability
When you combine planner challenges with accountability systems, you create a powerful structure that maximizes both motivation and productivity. Here’s why this combination works so well:
Keeps You Engaged:
- Challenges Provide Structure, Accountability Provides Support: Planner challenges give you clear goals and tasks to complete, while accountability partners or groups ensure that you follow through. This structure keeps you engaged in your planning routine and helps you stay consistent.
Encourages Reflection and Growth:
- Ongoing Feedback and Reflection: Accountability systems encourage regular reflection on your progress, helping you identify areas where you’ve succeeded and areas for improvement. Challenges push you to try new methods, and accountability ensures that you stick with them long enough to see results.
Fosters Community and Motivation:
- A Sense of Belonging: Engaging in challenges and accountability with others creates a sense of community and belonging. You’ll feel encouraged by the progress of others, and the shared experience can provide the motivation you need to stay committed to your goals.
By participating in planner challenges and building accountability systems, you can stay on track with your goals, boost productivity, and enjoy the support of a like-minded community. Whether you’re focused on personal growth, improving organization, or developing new habits, these tools can help you stay consistent, motivated, and engaged in your digital planning journey.
Analytics and Reviewing Progress in Digital Planners
One of the most powerful features of digital planners is their ability to track and analyze your progress over time. Whether you’re managing personal goals, professional projects, or daily tasks, the insights you gain from reviewing your progress can significantly enhance your productivity and decision-making. Digital planners allow you to create a feedback loop – set goals, track performance, review results, and adjust strategies, all in one place. This cycle of continuous improvement helps you stay focused, refine your planning techniques, and achieve long-term success.
In this section, we’ll explore how to effectively use analytics and progress reviews in digital planners to optimize your performance and ensure that you stay on track with your goals.
Why Analytics Matter in Digital Planning
Analytics in digital planning go beyond simply tracking tasks or checking items off a to-do list. By using data to review your progress, you can make informed decisions, identify patterns, and continuously improve your planning process. Here’s why analytics are so important:
Track Progress Toward Goals:
- Monitor Long-Term Goal Achievement: Analytics help you keep track of your progress toward long-term goals by breaking them down into smaller tasks or milestones. By reviewing this data, you can see how much progress you’ve made and whether you’re on track to meet deadlines.
- Example: If your goal is to run a marathon in six months, tracking your weekly training sessions helps you see if you’re improving your endurance and hitting your milestones on time.
Identify Patterns and Trends:
- Spot Habits and Trends: Analytics allow you to spot trends in your productivity, habits, and behavior over time. For example, you might notice that your productivity dips on certain days of the week or that you consistently complete more tasks in the morning than in the afternoon.
- Tip: Use charts or graphs to visualize trends, helping you better understand patterns in your work habits, mood, or energy levels.
Improve Time Management:
- Analyze Time Spent on Tasks: By tracking how much time you spend on different activities, you can identify where you might be losing time and where you can optimize your schedule. Analytics can help you spot inefficiencies and reallocate time to higher-priority tasks.
- Example: If you realize that you spend too much time on administrative tasks, you might decide to delegate some of those responsibilities or block out dedicated time for focused work.
Enhance Accountability:
- Stay Accountable with Data: Analytics provide an objective view of your progress, helping you stay accountable to yourself and others. Regularly reviewing your data ensures that you’re following through on commitments and staying on track with your goals.
- Tip: Set up weekly or monthly progress reviews in your planner to stay consistent with goal tracking and hold yourself accountable.
Types of Analytics in Digital Planners
Digital planners can generate a variety of data points to help you analyze your progress. These analytics range from simple task completion rates to more complex visualizations like graphs, charts, and reports. Here are some of the most useful types of analytics to track:
Task Completion Rates:
- Track Completed vs. Incomplete Tasks: One of the most basic metrics to track is the percentage of tasks you complete versus those that remain unfinished. This can give you an overview of your productivity and help you identify areas where you may be falling behind.
- Tip: Use task completion charts or a progress bar in your planner to visually track how many tasks you’ve completed each day, week, or month.
Habit Tracking Data:
- Monitor Habit Consistency: Habit tracking analytics allow you to see how consistently you’re following through on your habits, whether it’s exercising, journaling, or sticking to a new routine. You can track streaks (consecutive days of completing a habit) and overall habit adherence.
- Example: Create a habit tracker in your planner where each habit has a visual indicator (such as checkmarks, color-coding, or a percentage bar) that shows how often you’ve completed it over time.
Time-Tracking Analytics:
- Analyze Time Spent on Activities: Time-tracking analytics help you measure how long you spend on different tasks or projects. By analyzing this data, you can identify areas where you’re spending too much time and make adjustments to your schedule.
- Tip: Use time-blocking and integrate time-tracking tools like Toggl or RescueTime into your planner to monitor how you’re spending your hours.
Progress Toward Goals:
- Track Goal Completion Rates: For long-term goals, tracking progress toward specific milestones can be useful. Digital planners allow you to break goals into smaller, manageable steps, and then track how many of those steps have been completed.
- Tip: Use goal-setting templates in your planner to create visual progress bars or charts that show your advancement toward key milestones or deadlines.
Mood and Well-Being Data:
- Track Emotional Well-Being: Some digital planners allow you to track your mood or energy levels daily. Analyzing this data can help you identify patterns between your emotional state and your productivity, allowing you to adjust your routine for better well-being.
- Example: Use a mood tracker with color-coded indicators (e.g., green for positive days, yellow for neutral, red for stressful days) to monitor your emotional health and correlate it with your productivity.
Tools for Tracking Analytics in Digital Planners
Many digital planner apps offer built-in tools for tracking progress and analyzing data. Some also allow you to integrate with third-party apps that provide more advanced analytics. Here are some tools and features to look for:
Built-in Analytics Tools:
- Progress Bars and Task Checklists: Many digital planners include simple but effective tools like progress bars, to-do lists, and checklists. These visual tools allow you to track task completion and progress toward goals.
- Example: In GoodNotes or Notion, you can add task lists with progress indicators that show how many tasks you’ve completed versus how many are left.
- Habit Trackers: Apps like Habitica or Streaks allow you to track daily habits and provide analytics on how consistent you’ve been over time. These habit trackers can be integrated into your digital planner or used in conjunction with your main planning app.
- Tip: Use Habitica’s gamified approach to turn habit tracking into a fun, motivational experience.
Third-Party Time-Tracking Tools:
- Toggl or Clockify for Time-Tracking: If your planner doesn’t include time-tracking features, you can integrate third-party apps like Toggl or Clockify to monitor how long you spend on different tasks. These tools provide detailed reports on your time usage, helping you analyze productivity trends.
- Tip: Sync your time-tracking app with your planner to ensure that all tasks are accounted for and that you have a clear overview of where your time is going.
Project Management Tools with Analytics:
- Asana, Trello, or Monday.com: If you’re managing larger projects, tools like Asana, Trello, or Monday.com offer robust analytics features that track task completion, team progress, and project timelines. These tools can be integrated into your digital planner for advanced project tracking.
- Tip: Use Gantt charts or Kanban boards within these tools to visually track your project’s progress and deadlines, then sync the information to your planner for a holistic view.
Google Sheets or Excel for Custom Analytics:
- Create Custom Analytics in Google Sheets: For users who prefer a more data-driven approach, Google Sheets or Excel can be used to create custom analytics dashboards. You can input data from your planner into these spreadsheets and create formulas, charts, and graphs to analyze your productivity, task completion rates, and time usage.
- Example: Use Google Sheets to track your weekly goals and generate reports on how many tasks you completed, how long each took, and where you can improve.
How to Set Up a Review Process in Your Planner
To get the most out of your digital planner’s analytics, it’s important to establish a regular review process. This allows you to reflect on your progress, make adjustments, and refine your goals. Here’s how to set up an effective review process:
Daily or Weekly Reviews:
- Set Aside Time for Reflection: At the end of each day or week, set aside time to review your progress. Check your task completion rate, habit tracking data, and any other metrics you’re monitoring. This helps you stay accountable and aware of your daily habits and productivity levels.
- Tip: Create a dedicated “Review” section in your planner where you write down reflections on what went well and what could be improved.
Monthly and Quarterly Goal Reviews:
- Assess Long-Term Goals: At the end of each month or quarter, review your progress toward long-term goals. Use analytics like goal completion rates and milestone tracking to determine if you’re on track. If necessary, adjust your goals or timelines to reflect new priorities or challenges.
- Tip: Create a progress tracker in your planner that visually shows how far along you are with your long-term goals. Use graphs or progress bars to make this data easy to interpret.
Yearly Reflections:
- Annual Review for Personal Growth: At the end of each year, conduct a comprehensive review of your personal growth and achievements. Look at the data you’ve gathered throughout the year – habit tracking, time management, goal completion, and emotional well-being, and reflect on how these have contributed to your overall progress.
- Example: Use your digital planner to create a “Year in Review” page where you document your biggest accomplishments, lessons learned, and areas for improvement in the year ahead.
Set Actionable Next Steps:
- Create a Plan for Improvement: Based on the insights gained from your analytics, set actionable next steps. If you notice a recurring issue, such as consistently missing deadlines or neglecting certain habits, use your planner to create a strategy for addressing these challenges.
- Tip: Break down these next steps into smaller, manageable tasks that can be integrated into your daily or weekly planning routine.
Using Analytics to Stay Motivated
Reviewing your progress and seeing concrete data on your achievements can be a powerful motivator. By using analytics in your planner, you can celebrate milestones and stay energized as you work toward your goals.
Celebrate Milestones and Achievements:
- Reward Yourself for Progress: Use analytics to celebrate your wins, both big and small. Whether it’s completing a major project or sticking to a habit for 30 consecutive days, acknowledging these achievements helps you stay motivated.
- Tip: Create a “Celebrations” or “Wins” page in your planner where you document each milestone and reward yourself with something meaningful, like a day off, a favorite treat, or a new hobby.
Visualize Progress:
- Use Visual Tools to Track Growth: Charts, graphs, and progress bars provide a clear picture of your growth over time. These visual cues make your accomplishments tangible and encourage you to keep pushing toward your goals.
- Example: Set up a progress bar for long-term goals, such as learning a new skill or saving a certain amount of money, and update it regularly as you move closer to your target.
Stay Positive with Regular Check-ins:
- Use Analytics to Focus on Positive Progress: Even when things don’t go as planned, reviewing your data can help you focus on the progress you have made rather than the setbacks. Use regular check-ins to remind yourself of how far you’ve come, and use any negative data as an opportunity to adjust your strategy moving forward.
- Tip: Incorporate positive affirmations or reflections in your reviews to maintain a growth mindset and reinforce that progress is a journey.
By integrating analytics and progress reviews into your digital planning routine, you can gain valuable insights into your productivity, time management, and goal achievement. This data-driven approach helps you make informed decisions, track your growth, and continuously improve your personal and professional outcomes.
Adapting Digital Planners for Different Learning Styles
Everyone has their preferred way of learning and processing information, and using a digital planner that fits your learning style can significantly improve your organization, productivity, and overall planning experience. By tailoring your planner to suit your learning preferences, whether you’re a visual, auditory, reading/writing, or kinesthetic learner, you’ll be able to make the most out of your planning routine and ensure it works with how your brain naturally processes information.
Let’s explore how you can customize your digital planner for each of these learning styles.
Visual Learners
Visual learners process information best when it’s presented in a visual format, such as through charts, diagrams, or color-coded systems. If you’re a visual learner, you likely prefer using images, layouts, and colors to help you understand and retain information. Here’s how to adapt your digital planner to fit your needs:
Use Color-Coding for Clarity:
- Color-Coding Tasks and Events: Assign different colors to various aspects of your life, such as work, personal goals, family, and hobbies. This allows you to quickly differentiate between categories and see what needs attention at a glance.
- For example, use blue for work tasks, green for fitness, red for deadlines, and yellow for personal goals. Each color acts as a visual cue, making your planner more intuitive to navigate.
Incorporate Charts and Diagrams:
- Visualize Information with Diagrams: If you’re a fan of visual representations, use diagrams or flowcharts in your planner to organize complex information. You can draw mind maps for brainstorming ideas, flowcharts for projects, or Venn diagrams for decision-making.
- Some digital planner apps allow you to create and insert these visual elements directly into your planner. For example, use ZoomNotes for layered diagrams or GoodNotes to create simple flowcharts.
Utilize Visual Trackers:
- Progress Bars and Graphs: Visual learners benefit from seeing their progress clearly. Use visual trackers like progress bars or graphs to track goals, habits, and project milestones. This gives you a clear view of where you are and what’s left to achieve.
- For example, create a progress bar for tracking monthly goals or use pie charts to monitor how much time you’re spending on different activities.
Add Digital Stickers and Images:
- Enhance Your Planner with Stickers and Photos: Visual learners thrive with images and symbols. Use digital stickers to mark important tasks or events, and include relevant images to help reinforce certain concepts or ideas.
- For example, if you’re planning a trip, add photos of your destination or fun travel stickers to keep the excitement alive and visualize your goal.
Auditory Learners
Auditory learners process information best through sound and verbal explanations. If you learn best by listening, adapting your digital planner to include audio features can enhance your experience and make it more effective. Here’s how to customize your planner for auditory learning:
Record Audio Notes:
- Voice Memos for Planning: Instead of relying solely on written text, auditory learners can benefit from recording voice memos or audio notes directly in their digital planner. Apps like Notability and OneNote allow you to record audio alongside your written tasks or notes.
- Use voice memos to talk through your tasks for the day, record meeting notes, or capture ideas on the go. This allows you to revisit your plans by listening rather than reading.
Use Verbal Reminders:
- Set Audio-Based Reminders: Set up audio or spoken reminders using your digital planner app’s notification feature or by syncing it with apps like Google Calendar or Siri. These reminders can verbally notify you of upcoming tasks or deadlines, making sure you never miss anything important.
- You can also use smart assistants like Alexa or Google Assistant to set reminders based on tasks in your planner.
Listen to Recorded Content:
- Incorporate Podcasts or Audio Content: Auditory learners can benefit from including relevant audio content directly in their digital planners. If you’re working on a project, link to podcasts, recorded meetings, or educational content that supports your work.
- For example, if you’re learning a new skill, create a section in your planner to track progress and link to audio courses or podcasts that you can listen to as part of your learning process.
Talk Through Your Plans:
- Verbally Process Information: Instead of only writing down your plans, consider talking them through aloud. You can record these sessions in your planner, or simply use the act of verbalizing your thoughts to clarify your tasks and goals.
Reading/Writing Learners
Reading/writing learners prefer to process information through written words. They excel when taking notes, reading instructions, and writing out thoughts and ideas. If you’re a reading/writing learner, your digital planner can be adapted to optimize how you capture, organize, and review information.
Create Detailed Lists and Notes:
- Make Use of Bulleted and Numbered Lists: Reading/writing learners thrive on written information, so making detailed to-do lists, task breakdowns, and project outlines is crucial. Organize your planner with bulleted lists, numbered steps, or checklists to help you stay focused and organized.
- For example, write out each step for completing a project, from research and planning to execution and review, and use lists to break down the details.
Write Reflections and Summaries:
- Summarize Your Goals and Tasks: At the end of each day or week, use your digital planner to write reflections or summaries of what you accomplished, what you learned, and what needs improvement. This written reflection helps you process information and prepare for the next set of tasks.
- Journaling sections can also help you capture your thoughts and ideas in writing, making it easier to review and stay on track with your goals.
Utilize Text Highlights and Annotations:
- Highlight Key Points: Reading/writing learners often benefit from highlighting or underlining important information. Use your digital planner’s highlighting tools to emphasize critical tasks, upcoming deadlines, or important ideas.
- You can also annotate pages with handwritten notes or additional context for projects, assignments, or goals. This will help you better understand and retain the information.
Use Printable or Digital Templates:
- Templates for Structured Writing: Reading/writing learners may benefit from using printable templates or PDF inserts designed for tasks like essay planning, research outlines, or project tracking. You can import these templates into your digital planner to provide more structure to your written work.
- For example, use a template for writing goals with spaces to write detailed descriptions, deadlines, and next steps.
Kinesthetic Learners
Kinesthetic learners learn best by doing and engaging physically with their environment. They prefer hands-on activities and practical applications. For kinesthetic learners, making your digital planner more interactive can enhance the learning and planning experience.
Use Interactive Elements:
- Add Drag-and-Drop Features: Some digital planner apps allow you to use drag-and-drop features, which can be great for kinesthetic learners who prefer to interact with their tasks physically. Move tasks around on your calendar or timeline, rearrange priorities, and physically interact with your planner in a way that mimics the tactile experience of a physical planner.
- For example, you can drag tasks from a to-do list into a completed section or rearrange your calendar based on changing priorities.
Make Use of Handwriting:
- Write and Draw by Hand: Many kinesthetic learners benefit from the act of writing by hand. If you use a tablet with a stylus (e.g., an iPad with an Apple Pencil), use your digital planner to handwrite notes, to-do lists, or even draw diagrams and sketches.
- Apps like GoodNotes and Notability are excellent for handwriting and allow you to combine typed text with handwritten notes.
Engage with Physical Movement:
- Incorporate Movement into Your Planning: Kinesthetic learners can benefit from incorporating movement into their planning process. For example, you can schedule breaks for physical activities like stretching, walking, or exercising between planning sessions. Add these physical activities directly into your planner as part of your daily routine.
- Use habit trackers in your planner to log physical activities like workouts, walks, or active learning tasks (e.g., hands-on projects, DIY tasks).
Incorporate Interactive Checklists:
- Use Checklists to Track Progress: Kinesthetic learners thrive on interaction, so using checklists that you can mark off as tasks are completed provides a tactile sense of progress. The act of checking off a task after it’s finished provides a physical interaction that can be satisfying and motivating.
- Some apps even include sound effects or animations when you complete tasks, making the experience even more engaging for kinesthetic learners.
Blending Multiple Learning Styles
Most people don’t fit neatly into just one learning style, they might benefit from a blend of visual, auditory, reading/writing, and kinesthetic approaches. Here’s how to create a digital planner that combines different methods:
Combine Visual and Written Elements:
- Use a mix of written notes and visual aids like color-coded sections, charts, and diagrams to capture ideas and information. For example, write out your to-do lists and goals while incorporating visual progress bars and habit trackers for added clarity.
Integrate Audio and Visual Cues:
- Combine audio notes with visual representations like color-coded sections or diagrams. For example, record a voice memo summarizing your meeting notes and include a mind map or chart to visually organize your next steps.
Create an Interactive Planning Routine:
- Create a hands-on routine that involves both writing and physical interaction with your planner, such as handwriting notes, dragging tasks around, and marking off checklists. Add audio reminders for key deadlines or use progress bars to visually track accomplishments.
By blending different learning styles, you can create a versatile planner that works for you in multiple ways, enhancing your ability to process and retain information.
By adapting your digital planner to fit your learning style, you’ll be able to process information more effectively and stay organized in a way that feels natural. Whether you’re a visual learner who thrives on colors and diagrams, an auditory learner who benefits from voice memos, or a kinesthetic learner who prefers interactive features, customizing your digital planner can make a big difference in your productivity and planning success.
Digital Planner Security and Backup
As digital planners become an essential part of your daily life, it’s important to safeguard your data from potential threats such as loss, hacking, or device failure. Whether you store personal, financial, or professional information in your planner, ensuring its security and maintaining regular backups can save you from significant stress and prevent data loss.
In this section, we’ll explore the best practices for securing your digital planner, setting up reliable backups, and protecting your information from unauthorized access.
Why Digital Planner Security Is Important
Digital planners often contain sensitive information like personal schedules, financial details, business projects, and private notes. If this data is lost, hacked, or exposed, it can lead to a range of problems, including identity theft, financial loss, or even business disruption. Understanding how to secure your digital planner ensures your personal data remains safe and that you have access to your information at all times.
How to Secure Your Digital Planner
Protecting your digital planner involves securing both the app or platform you use and the devices you access it from. Here are the most effective ways to secure your planner:
Use Strong Password Protection:
- Set Up a Strong Password for Your Planner App: Many digital planner apps, like GoodNotes, Notability, and OneNote, offer password protection features. Ensure you use a strong, unique password that combines upper and lower-case letters, numbers, and special characters.
- Example: Instead of a simple password like “planner123,” use a complex combination like “G00dN0tes$P1anner!2024” for better security.
Enable Two-Factor Authentication (2FA):
- Add an Extra Layer of Security with 2FA: If your planner app or cloud service supports two-factor authentication (2FA), enable it. 2FA requires not only your password but also a second verification step (such as a code sent to your phone) to access your planner.
- Example: When logging into your cloud storage (e.g., Google Drive or iCloud), you’ll receive a unique code on your mobile device that you’ll need to enter along with your password. This makes it much harder for unauthorized users to access your data.
Encrypt Your Data:
- Ensure Your Data Is Encrypted: Some apps and cloud storage services provide encryption to protect your data both at rest and in transit. End-to-end encryption ensures that even if someone intercepts your data, they won’t be able to read it.
- Tip: Check if your app or cloud provider (e.g., Google Drive, iCloud, Dropbox) uses encryption and make sure it’s turned on.
Lock Your Device:
- Use a Strong Lock on Your Device: Ensure that the devices you use to access your digital planner (e.g., tablet, phone, computer) are locked with a strong password, PIN, or biometric authentication (like a fingerprint or facial recognition).
- If you’re using a tablet, enable features like Face ID (iOS) or biometric locks (Android) for quick and secure access.
Be Mindful of Public Wi-Fi:
- Avoid Unsecured Public Networks: When accessing your digital planner in public places (like cafes or libraries), avoid using unsecured public Wi-Fi. Instead, use your phone’s data connection or a VPN (Virtual Private Network) to protect your data from potential hacking.
Regular Backup Practices to Protect Your Data
Backing up your digital planner ensures that if your device is lost, damaged, or stolen, or if an app crashes, you won’t lose access to your important information. Regularly backing up your planner is crucial for keeping your data safe. Here’s how to do it:
Use Cloud Storage for Automatic Backups:
- Sync with Cloud Storage Services: Many digital planner apps automatically sync with cloud storage services like iCloud, Google Drive, or Dropbox. This ensures your planner is backed up in real-time and can be accessed from any device.
- Example: If you’re using GoodNotes or Notability, you can sync your planner to iCloud so that your data is backed up every time you make changes. This way, you won’t lose your planner if your device fails.
Manual Backup to External Storage:
- Regularly Export and Backup Your Planner: In addition to cloud storage, manually back up your planner to an external hard drive or USB stick. Export your planner as a PDF or backup file (many apps offer this feature) and save it in a secure location.
- Tip: Schedule a reminder in your planner to back up your data manually at least once a month or after completing major updates.
Version Control and Restore Options:
- Use Version Control Features: Some apps or cloud services, like Google Drive and Dropbox, offer version history so you can restore previous versions of your planner if something goes wrong.
- Tip: If you accidentally delete or overwrite important data, you can use version control to recover it. Check your app settings to ensure version control is enabled.
Test Your Backups:
- Regularly Test Backup Restores: A backup is only useful if it works when you need it. Periodically test your backups by restoring them to ensure the data is intact and accessible.
- Tip: Choose a time when you can safely test a restore (e.g., at the end of the month) and confirm that all your data is backed up correctly.
What to Do if Your Planner is Lost or Compromised
In the unfortunate event that your digital planner is compromised (due to a hacked account, stolen device, or app crash), taking immediate action can help mitigate the damage.
Change Your Passwords Immediately:
- Reset Passwords: If your planner or any associated accounts (e.g., cloud storage) are compromised, immediately reset your passwords. Make sure the new password is strong, unique, and not used for any other accounts.
- Tip: Consider using a password manager to securely store and generate complex passwords for all your accounts.
Disconnect from the Cloud:
- Revoke Cloud Access: If you suspect unauthorized access to your cloud storage, disconnect your digital planner app from the cloud and revoke access to any suspicious devices. This can usually be done through the settings of your cloud storage provider (Google Drive, iCloud, etc.).
- Tip: Review the list of devices connected to your cloud account and remove any unfamiliar ones.
Restore from Backup:
- Recover Data from a Backup: If you lose access to your planner, restore it from your most recent backup. Depending on your backup method (cloud, external storage, or app-specific backups), follow the restore instructions provided by your app or cloud service.
Enable Remote Wipe on Lost Devices:
- Use Remote Wipe: If your device is lost or stolen, use Find My iPhone (iOS) or Find My Device (Android) to remotely erase all data from your device. This ensures that your digital planner and any sensitive information aren’t accessible to unauthorized individuals.
- Tip: Always enable remote wipe features on your devices as a precaution.
Best Backup Solutions for Digital Planners
Choosing the right backup solution depends on your preferences and the type of data you store in your planner. Here are some of the best options for securely backing up your digital planner:
Cloud-Based Backup Solutions:
- iCloud (for Apple users): Automatically syncs your planner data across all your Apple devices. Provides end-to-end encryption for added security.
- Google Drive (cross-platform): Offers real-time syncing across devices and version history for easy data recovery. A great option for both Android and iOS users.
- Dropbox: Known for its robust version control and ease of use across platforms. It’s ideal for users who want to access their planner from different devices.
External Backup Solutions:
- External Hard Drives: For users who prefer offline backups, external hard drives are a reliable solution. Manually back up your planner to an external drive in PDF or planner-specific formats (e.g., GoodNotes backups).
- USB Sticks: Portable and convenient for backing up smaller planners or important sections. Save your planner files to USB sticks for an extra layer of security.
Third-Party Backup Services:
- Backblaze: An automatic cloud backup service that runs in the background and backs up your entire device, including your digital planner. It offers unlimited storage and is great for users who need continuous backups without manual intervention.
- Carbonite: Another automatic backup service that can protect your planner along with all your other important files. It’s useful for users with large amounts of data or who need more comprehensive protection.
How to Manage and Organize Your Backups
Staying organized with your backups ensures that you can easily find and restore your data when needed. Here are some tips for managing your backups efficiently:
Create a Backup Schedule:
- Set a Regular Backup Schedule: Consistency is key to effective backups. Whether you’re using manual or cloud-based backups, create a schedule that works for you. For example, back up your planner weekly if you update it frequently, or monthly if your updates are less frequent.
- Set reminders in your digital planner to perform manual backups, ensuring you never forget.
Label and Organize Backup Files:
- Label Backup Versions Clearly: Name your backup files with dates and descriptions to keep them organized. For example, “Planner_Backup_Aug2024” or “Weekly_Planner_Budget_July2024.” This way, if you need to restore a specific version, you’ll know exactly where to find it.
- Organize backup files in folders by date or category (e.g., “Monthly Backups,” “Project Backups”) for quick access.
Limit the Number of Backups:
- Purge Old Backups: Regularly delete outdated or unnecessary backups to avoid clutter. Keep only the most recent and critical backups to save storage space while ensuring you have the versions that matter most.
Using Version Control for Safety
Version control ensures you can go back to previous versions of your planner if needed. It’s especially useful if you accidentally delete or change something in your planner.
Check Your Cloud Provider’s Version History:
- Access Previous Versions: Services like Google Drive and Dropbox automatically save versions of your files, so you can restore an earlier version if needed. This feature can be a lifesaver if you mistakenly delete or modify a key section of your planner.
- Tip: Periodically check that version history is enabled in your cloud storage settings.
Use Version Control Features in Your Planner App:
- Save Manual Versions: Some planner apps allow you to save different versions or snapshots of your planner. Take advantage of these features to save a version after a major update or at the end of each week or month.
By following these security and backup practices, you can ensure that your digital planner is well-protected, secure, and always accessible. Whether you’re relying on cloud storage, external backups, or advanced encryption, safeguarding your planner gives you peace of mind and ensures you never lose important data.
Eco-Friendly Benefits of Digital Planning
In today’s world, where environmental sustainability is becoming increasingly important, digital planners offer a powerful way to reduce your carbon footprint and contribute to a healthier planet. By replacing paper-based planning systems with digital alternatives, you can cut down on paper waste, reduce deforestation, and limit your reliance on physical resources, all while enjoying the flexibility and efficiency of digital tools.
Let’s explore the key eco-friendly benefits of switching to digital planning and how it can positively impact the environment.
Reducing Paper Waste
One of the most immediate and significant eco-friendly benefits of digital planning is the drastic reduction in paper usage. Traditional paper planners require frequent replacement, and once they’re filled up or out of date, they are often thrown away, contributing to waste.
Less Paper Consumption:
- No Need for Annual Replacements: With digital planners, there’s no need to buy a new planner each year or month. Digital planners can be reused indefinitely, with templates that can be easily duplicated and updated without printing anything.
- Traditional planners, on the other hand, use thousands of sheets of paper annually, whether it’s for the daily pages, weekly layouts, or additional notes.
- Fewer Notebooks and Sticky Notes: Digital planners eliminate the need for extra paper-based products like sticky notes, notebooks, and paper inserts. Instead, you can digitally manage tasks, to-do lists, and reminders without creating unnecessary paper waste.
Contribute to Forest Preservation:
- Lower Demand for Paper Products: By reducing your use of paper planners, you’re also reducing the demand for paper products, which can help reduce deforestation. Paper production is a resource-intensive process that requires cutting down trees, using large amounts of water, and consuming energy.
- In contrast, digital planners are an eco-friendly alternative that can store as much information as needed without the environmental cost of paper production.
Reducing Carbon Footprint from Production and Shipping
Producing and distributing physical planners, notebooks, and accessories involves a significant amount of energy and resources. This includes the carbon footprint associated with manufacturing, packaging, and shipping these products around the world. Digital planners offer a greener alternative by eliminating these processes.
Lower Energy Use in Production:
- No Manufacturing Impact: Traditional paper planners require energy to produce, including the processes involved in harvesting trees, manufacturing paper, printing, and binding. Each of these steps contributes to CO2 emissions and environmental degradation.
- Digital planners, on the other hand, are created and distributed electronically, meaning no physical resources are used, and energy consumption is limited to digital platforms.
No Packaging or Shipping:
- Reduce Packaging Waste: Physical planners often come with packaging materials such as plastic wrapping, cardboard, or other non-recyclable materials. Switching to digital planners completely eliminates the need for packaging and reduces plastic waste.
- No Shipping Carbon Footprint: Shipping paper planners, whether it’s from manufacturers to stores or directly to consumers, creates a carbon footprint from transportation. Digital planners are downloadable instantly from anywhere in the world, cutting out the need for transportation and its associated emissions.
Eliminating the Need for Printing
One of the most eco-friendly aspects of digital planning is that everything is stored electronically, meaning there’s no need to print anything out. This greatly reduces paper and ink consumption, both of which have a negative impact on the environment.
Ink and Toner Waste:
- No More Ink and Toner: Ink and toner cartridges used in printers are notoriously difficult to recycle and often end up in landfills, where they can release toxic chemicals into the environment. Digital planners eliminate the need for printing, reducing the amount of ink and toner waste produced.
- Tip: Even if you prefer to occasionally print parts of your planner, doing so digitally gives you the flexibility to print only what’s necessary, minimizing waste compared to using a paper planner daily.
Save Resources on Corrections:
- No Need for Reprinting: With digital planners, there’s no need to waste paper or ink making corrections or updates. If you need to change an appointment, modify a goal, or rearrange tasks, you can do so instantly and without reprinting.
- This saves paper compared to traditional planners where you might need to cross out entries or reprint pages for updates or mistakes.
Supporting a Zero-Waste Lifestyle
Digital planning fits perfectly with a zero-waste lifestyle, where the goal is to reduce the amount of waste we produce and the materials we consume. By choosing a digital planner, you align with sustainable habits that prioritize reducing, reusing, and recycling.
Minimizing Physical Waste:
- No Physical Planner to Dispose Of: Unlike paper planners, which eventually end up in the trash or recycling bin after they’ve been used, digital planners don’t contribute to physical waste. You can store years of planner data on your device without taking up physical space or generating garbage.
- This reduces your personal waste footprint and helps minimize the strain on landfills.
Reusable Templates:
- Create and Reuse Digital Templates: In a digital planner, you can create templates for tasks like daily planning, project management, budgeting, and meal planning. These templates can be reused repeatedly without needing to print new pages, reducing the amount of waste generated by repetitive tasks.
- You can easily update and modify templates digitally, making them an efficient and sustainable tool.
Recycling and Reusing Digital Assets:
- Repurpose and Recycle Digital Assets: Unlike physical stickers, planners, or inserts that are discarded after use, digital stickers and inserts can be reused indefinitely. Once you download or create digital assets, they can be used in various ways across multiple planners, eliminating the need for additional materials.
Energy Efficiency of Digital Devices
While digital planners require the use of electronic devices such as tablets, smartphones, or computers, these devices are often energy-efficient, especially when compared to the cumulative impact of producing, using, and disposing of paper planners over time.
Low Energy Consumption of Modern Devices:
- Energy-Efficient Devices: Tablets and smartphones are becoming increasingly energy-efficient, with longer battery life and reduced energy consumption. This means that using your digital planner on these devices doesn’t require a significant amount of energy, especially compared to the environmental impact of producing and disposing of paper planners.
- Many people already use these devices for other purposes, meaning the additional energy required to operate a digital planner is minimal.
Charging with Renewable Energy:
- Use Renewable Energy Sources: If you have access to renewable energy sources such as solar or wind power, you can charge your devices in a completely eco-friendly way. This makes digital planning an even more sustainable option, as your energy use is offset by clean, renewable sources.
- You can also reduce your energy consumption by turning off devices when not in use or using energy-saving modes on tablets and phones.
Reducing the Need for Physical Accessories
Traditional paper planners often require various accessories, including pens, highlighters, stickers, and inserts. These items not only generate additional waste but also often come in packaging that isn’t eco-friendly. Digital planners eliminate the need for most of these physical accessories.
Say Goodbye to Pens and Highlighters:
- Digital Pens and Highlighters: Digital planners come equipped with built-in tools that allow you to highlight, write, and annotate without the need for physical pens, pencils, or markers. These tools never run out and don’t need to be replaced, reducing plastic waste and consumption.
Digital Stickers Over Physical Ones:
- Reusable Digital Stickers: Physical stickers are single-use and often made from materials that aren’t recyclable. In contrast, digital stickers can be used over and over again without any physical waste. Once downloaded, they can be added to your planner indefinitely, reducing the environmental impact.
No Need for Folders and Inserts:
- Organize Without Extra Materials: Paper planners often require additional folders, inserts, or dividers to stay organized. Digital planners, however, allow you to organize your information seamlessly without the need for any physical tools. This reduces the need for extra office supplies and storage space.
Long-Term Sustainability Benefits
Switching to digital planning has long-term benefits for both you and the environment. By making the transition, you can contribute to a more sustainable lifestyle while enjoying the flexibility and advantages of digital tools.
Decreasing Resource Consumption Over Time:
- Sustainable Planning Habits: Over the course of several years, using a digital planner instead of multiple paper planners leads to a significant reduction in paper, ink, energy, and other resources. The cumulative effect of switching to digital planning helps decrease your overall environmental impact.
Leading by Example:
- Inspire Others to Go Digital: By embracing digital planning and showcasing its eco-friendly benefits, you can inspire others, whether they’re friends, family, or colleagues, to adopt more sustainable practices. As more people switch to digital solutions, the demand for paper-based planners decreases, contributing to a more eco-friendly world.
- You can share tips on digital planning through social media or in conversations, encouraging others to explore this sustainable option.
Hybrid Options: Balancing Digital and Minimal Paper Use
For those who prefer a mix of digital and paper planning, a hybrid approach can also be eco-friendly. You can still significantly reduce waste by using digital planners for most tasks while printing only essential pages when necessary.
Print Only What You Need:
- Selective Printing: If you prefer having some physical pages for reference or special projects, you can still use a digital planner for the majority of your tasks and print only the most essential parts. This hybrid approach reduces waste compared to using a fully paper-based planner.
- For example, you can print a monthly calendar for your desk but manage daily tasks digitally.
Sustainable Printing Practices:
- Use Recycled Paper and Eco-Friendly Ink: If you do print pages from your digital planner, make sure to use recycled paper and eco-friendly ink. This further reduces the environmental impact while allowing you to keep a physical copy of your plans when needed.
By switching to digital planning, you’re not only enhancing your personal organization and productivity but also contributing to a more sustainable future. With significant reductions in paper waste, energy use, and resource consumption, digital planners are a powerful tool for anyone looking to live a more eco-friendly lifestyle.
Digital Planner Community & Support
Using a digital planner is more than just a personal tool for organization, it’s also an opportunity to engage with a supportive and creative community. Connecting with other digital planner users can offer valuable insights, helpful resources, and a sense of camaraderie as you navigate the world of digital planning. Whether you’re looking for creative inspiration, troubleshooting help, or simply want to share your progress, becoming part of a community or seeking support from experts can significantly improve your digital planning journey.
Let’s explore the importance of community involvement, where to find support, and how to engage with others to get the most out of your digital planner.
The Value of a Digital Planner Community
A community of like-minded digital planner users can provide a wealth of knowledge and support. Being part of a community helps you stay motivated, discover new features, and gain fresh perspectives on how to make the most of your planner. Here’s why engaging with a digital planner community is so valuable:
Learn New Tips and Tricks:
- Benefit from Shared Knowledge: Digital planner communities are full of users who love to share tips, tricks, and hacks for optimizing planners. You can learn about hidden features in your app, creative ways to track goals, or efficient time-management techniques that you hadn’t considered before.
- Example: You might discover how to integrate habit trackers more effectively or learn how others use digital stickers and templates to streamline their workflow.
Creative Inspiration:
- Get Inspired by Others: Seeing how other users personalize and decorate their digital planners can spark new ideas for your own planner. From creative layouts to unique color schemes and themed sticker sets, there’s no shortage of inspiration in a thriving digital planner community.
- You can find inspiration for seasonal designs, minimalist layouts, or even how to incorporate vision boards and motivational quotes into your planner.
Troubleshooting and Support:
- Get Help with Technical Issues: If you encounter technical difficulties with your digital planner app or have questions about how to use certain features, community members are often quick to help. From syncing issues to figuring out new app updates, having access to knowledgeable users can save you time and frustration.
- Example: If you’re having trouble with hyperlinks in GoodNotes or syncing your planner with cloud services, fellow community members may offer step-by-step instructions to resolve the issue.
Accountability and Motivation:
- Stay Motivated and Accountable: Engaging with a digital planner community can help you stay on track with your goals. Many communities organize challenges, goal-setting sessions, and accountability groups where users share their progress and encourage each other to stay productive.
- Tip: Join a monthly or weekly goal-setting group where members post their plans and check in on progress. This can provide a sense of accountability and motivate you to complete your tasks.
Where to Find Digital Planner Communities
There are many places where you can connect with fellow digital planner users, from social media platforms to specialized forums. Here are some of the best places to find a digital planner community:
Facebook Groups:
- Join Active Planner Groups: Facebook has a large number of groups dedicated to digital planning. These groups range from general digital planner communities to niche groups focused on specific apps, aesthetics, or planning goals.
- Popular Groups: Search for groups like “Digital Planner Enthusiasts,” “GoodNotes Planners & Journals,” or “Notability Users Group” to find communities with regular posts, shared templates, and discussions.
Instagram and Pinterest:
- Follow Digital Planner Creators: Instagram and Pinterest are ideal platforms for discovering creative ideas and seeing how other users are designing their planners. You can follow digital planner influencers, browse hashtags like #digitalplanning or #goodnotesplanner, and save ideas for your own planner.
- Tip: Search for Instagram accounts that focus on digital planning for specific purposes, such as business planning, fitness tracking, or student planners. You’ll find a variety of content, from tutorials to planner layout inspiration.
Reddit Communities:
- Engage in Planner Subreddits: Reddit has dedicated forums (subreddits) where users can ask questions, share tips, and showcase their planners. Some of the most popular digital planning subreddits include r/digitalplanning and r/GoodNotes.
- Example: If you’re seeking advice on a specific app feature or looking for feedback on your planner design, Reddit’s active user base can provide quick and helpful responses.
YouTube Channels:
- Watch Tutorials and Planner Walkthroughs: Many YouTube creators produce content dedicated to digital planning, including app tutorials, planner walkthroughs, and design ideas. Watching these videos can help you get more familiar with your planner’s features and learn new techniques for customization.
- Popular Creators: Look for channels like Planning with Kay, Digital Planning by Kristin, or Amanda’s Favorites for in-depth guides and creative inspiration.
Dedicated Forums and Blogs:
- Join Planner-Specific Forums: Some websites have forums or message boards where digital planner users can ask questions, share tips, and discuss their planning experiences. You can also find blogs that offer downloadable templates, tutorials, and reviews of various planner apps.
- Example: Check out websites like Planner Squad or The Pink Ink for resources, digital planner templates, and a supportive community of planners.
Engaging with the Community
Once you’ve found a community that suits your needs, engaging with other users is key to getting the most out of your experience. Here are some ways to participate actively in digital planner communities:
Share Your Own Layouts and Designs:
- Showcase Your Planner: Don’t hesitate to share your own planner designs, layouts, and customization ideas. Whether you’ve created a unique daily spread, designed a beautiful monthly layout, or found a new way to track goals, posting your work can inspire others and help you feel more connected to the community.
- Tip: When sharing on social media, include hashtags like #digitalplanner, #plannercommunity, or #planneraddict to reach a broader audience.
Ask Questions and Offer Help:
- Engage in Discussions: If you’re ever unsure about how to use a certain feature, don’t hesitate to ask the community for help. Likewise, if you see a fellow user struggling with something you’ve already mastered, offering assistance fosters a sense of community and collaboration.
- Example: Ask how others integrate their planners with apps like Trello or Evernote, or offer your insights on the best way to set up a habit tracker.
Participate in Challenges and Prompts:
- Join Challenges to Stay Engaged: Many digital planner communities organize challenges, such as monthly goal-setting, productivity sprints, or creative layout contests. Participating in these events can motivate you to stay consistent with your planning and give you the opportunity to try new layouts or features.
- Example: Join a 30-day planner challenge where each day focuses on a different aspect of planning, such as creating a vision board, setting goals, or designing a custom habit tracker.
Finding Support for Specific Planner Apps
Different digital planner apps come with unique features and challenges. Finding support that’s specific to the app you use can help you master advanced features, troubleshoot issues, and discover new ways to enhance your planner.
App-Specific Communities:
- GoodNotes Users: There are many communities specifically for GoodNotes users, where you can learn tips for using its drawing and hyperlink features, as well as discover templates and stickers. Join groups on Reddit, Facebook, or Instagram to find tutorials and ask questions.
- Notability Communities: Notability is popular for its audio note-taking and handwriting features. Communities dedicated to Notability can help you explore these features more deeply and find ways to integrate them into your planner.
- OneNote Users: Microsoft OneNote users can benefit from forums and blogs that discuss how to use OneNote as a digital planner. Look for communities that focus on syncing OneNote across devices, using tags and sections efficiently, and integrating it with other Microsoft apps.
Official App Support:
- Use App Support Pages and Tutorials: Most planner apps offer official support pages with FAQs, troubleshooting guides, and tutorials. If you encounter technical issues, these pages can be a valuable resource.
- Example: If you need help syncing your planner across multiple devices, the official GoodNotes Help Center or Notability Support may offer a step-by-step guide to resolve the issue.
Contributing to the Digital Planning Community
Being an active member of the digital planning community isn’t just about seeking help, it’s also about sharing your knowledge and creativity with others. Here’s how you can contribute:
Create and Share Templates:
- Design and Distribute Templates: If you enjoy designing layouts, consider creating templates that others can use. You can share these for free in planner groups or sell them on platforms like Etsy or Gumroad. Many people appreciate having access to well-designed templates that save them time and effort.
- Tip: Create templates for different needs, such as budgeting, fitness tracking, or daily routines. Sharing these templates helps others get organized and builds a sense of community.
Offer Tutorials and Tips:
- Share Your Expertise: If you’re skilled in using a particular planner app or have found effective ways to manage your time and goals, consider offering tutorials or tips. You can post these in planner groups, on social media, or even create blog posts or YouTube videos.
- Example: Share a tutorial on how to create a custom habit tracker in GoodNotes or explain how to use hyperlinks for quick navigation in Notability.
Host Planner Events or Workshops:
- Organize Planner Meetups: If you’re passionate about digital planning, you can host virtual workshops or local meetups to share tips, offer guidance, and connect with others. These events can be focused on specific topics like goal-setting, using planner apps efficiently, or creative digital journaling.
- Tip: Collaborate with other digital planner enthusiasts or influencers to host joint workshops, which can draw a larger audience and provide a richer learning experience.
Benefits of Seeking Professional Support
If you run into more complex challenges or need personalized guidance, seeking professional support can help you get the most out of your digital planner:
Hire a Digital Planning Coach:
- Personalized Planner Coaching: Some professionals offer personalized digital planning coaching, where they guide you through setting up and optimizing your planner to suit your specific needs. Whether it’s managing work projects, streamlining your daily routine, or achieving long-term goals, a coach can provide valuable insights.
Get Technical Support from App Developers:
- Contact the App’s Support Team: If you encounter technical issues with your digital planner app, reaching out to the app’s support team can provide solutions. Whether it’s fixing bugs, improving sync across devices, or resolving app crashes, the support team can offer detailed instructions.
- Example: If you’re having trouble with cloud syncing or data loss, the app developers may be able to restore your planner data or offer a workaround.
By engaging with the digital planning community and accessing available support, you can learn new skills, troubleshoot problems, and feel more connected with others who share your passion for digital planning. Whether you’re sharing ideas, seeking advice, or contributing templates, being part of a supportive community makes the planning process more enjoyable and effective.
AI TRANSPARENCY: Whilst the majority of our creations have been created completely traditionally, occasionally we utilize AI tools in our design process. We acknowledge the advancements in AI technology and leverage them responsibly to optimize our creative output. However, it is important to note that our utilization of AI does not compromise the human element of our work. Our commitment to delivering high-quality designs through a balanced integration of traditional expertise and AI enhancements remains paramount.